
Showing posts with label Tonic Aqua Shimmer Pen. Show all posts
Showing posts with label Tonic Aqua Shimmer Pen. Show all posts

Happy Monday, crafty friends! I hope you had a wonderful weekend! Can you believe we are in the final days of not only this year, but this decade? Man - what a decade it has been. It hasn't been an easy decade for me, but it will always be my favorite because it is the decade that my little ones were born. They may have only graced me with their presence for a short time, but they that short time was my greatest gift.
I got some cardmaking time in this weekend, and decided to play along with MFT's Wednesday Sketch Challenge #469. It's a good one for this Fairy-Tale Friends stamp set that I purchased, and haven't had a moment to use yet! Here is a look at the sketch:

Here is my take on the sketch. I've combined the Fairy-Tale Friends stamp set and coordinating dies with Magical Rainbow and Cute Cloud Outlines die sets. I also did some very light ink blending in the background with TE's Set the Scene Cloud stencils and Distress Oxide inks in Tattered Rose, Worn Lipstick, Tumbled Glass, Peacock Feathers & Wilted Violet (linked at the end of the post). I used my TE Blender Brushes to achieve such light blending. When I finished blending, I stamped the sentiment to the bottom then covered it up with the same stamp. I lightly spritzed it with clear shimmer spray first, then added just a tiny spritz of gold shimmer spray.


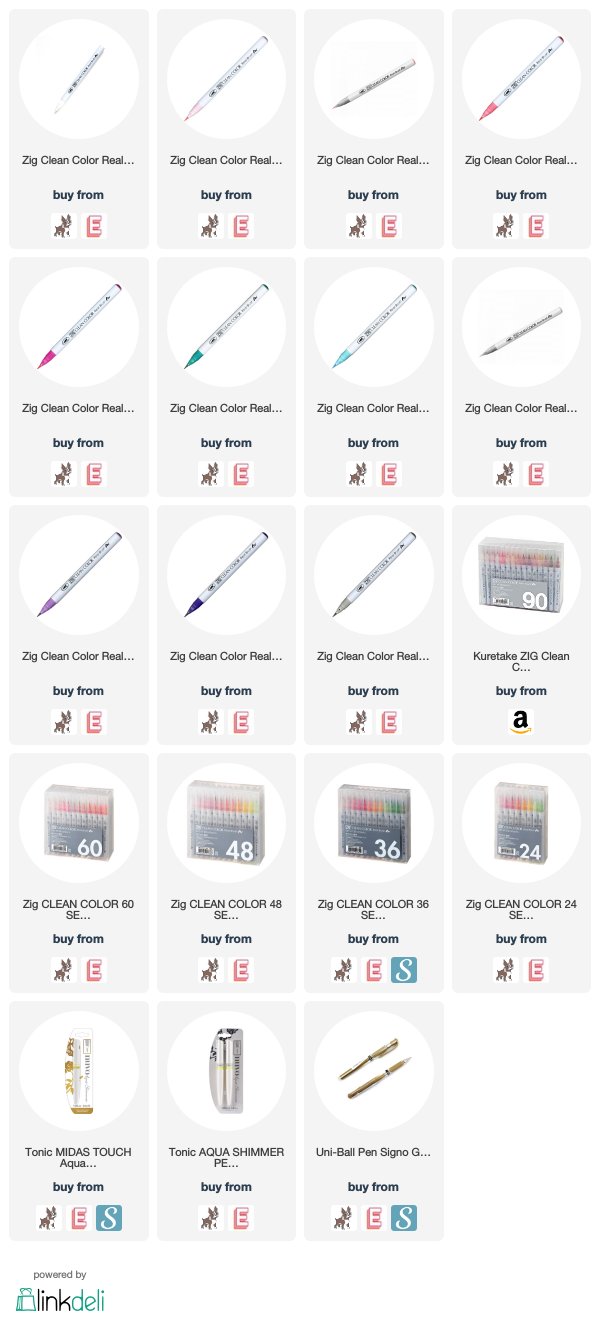
I colored the unicorn in with Zig Clean Color Real Brush markers. Rather than using water, I typically blend the colors with the Zig blender brush. Here is a list of all the colors I've used. At the end you will see some different set options, but I think the only set that will have all of the colors is the 90 set. This Zig Line Up link is one of the best ways to know what colors are offered in each set!
Body/Nose: pale gray + blender, midas touch aqua shimmer (nose only)
Wings: haze blue + blender, glitter gloss aqua shimmer
Mane/Tail: light carmine, tea rose, pink, light pink, turquoise green, light blue, violet, light violet + blender, midas touch aqua shimmer
Horn/Hooves: gold Uniball Gel Impact pen
PEN LIST:
Here is a closer look at the colored & shimmery unicorn!


PEN LIST:
Here is a closer look at the colored & shimmery unicorn!
Once I did all the diecutting, I covered just the cloud outlines in glitter. Then I put the card together as shown, popping items up with foam dots here & there. Finally, I did some accenting with iridescent jewels from Lucy's Little Things (linked below).


That is everything I have for you today! If you have any questions about my card, feel free to leave them in the comments and I will be sure to reply.

NEW BLOG FEATURE:
CRAFTY QUESTION OF THE POST
What are your favorite ink blending tools?

I thought I would start a new feature to my posts, where I ask you about something, but also answer it myself! I hope it helps me to know you better, and learn about products or techniques that I am unaware of. And hopefully it will be beneficial for you too! The question will likely relate to the card I've created for the post, and today is all about ink blending! I own three different sets of ink blending tools, and I use all three for different reasons.
1. TE Blender Brushes: I reach for these the most because they are color coded. I don't really have to clean them between uses, just blot off any excess ink on to scrap paper. If they do need a cleaning, I've found a damp, soft cloth works perfectly. They also help me keep a soft hand when I want to keep the ink blending light, and you can gradually add more color in.
2. Ranger Mini Round Ink Blending Tool: I've had these the longest, and I will never get rid of them. They are perfect when you want a heavier hand and bolder colors when ink blending. I've blended some of the most seamless and beautiful backgrounds with these tools, and they are a staple in my crafting studio.
3. Picket Fence Studios Life Changing Brushes: I love the different sizes & shapes included in the full set, and I reach for them most when I am trying to keep my ink blending in a very small area. Or, I grab the biggest brush when I am ink blending a full panel with the same color.
I can't wait to hear your responses! Before you move along with your day, I wanted to invite you to follow me on social media. I would love to be crafty friends online! You will likely see my question on IG & FB too, so you can answer wherever you'd like!
Have a happy Monday! I hope you get some crafty time in. :)
SUPPLY LIST


Happy Saturday, crafty friends! I hope you are having a good start to your weekend. It is a gloomy day here in Minneapolis, and as I type me & the pups are lounging on the couches with a hot cup of coffee (well, that's for me. Not the pups. Lol!). I have plans to get some crafty time in today!
I wanted to let you know that the Pinkfresh Studio weekend promo is an awesome one this weekend! We are offering 15% off the Essentials 1 release. This collection of products was my "baby" of sorts, and I am super proud of how it turned out - and I'm excited to let you know about the savings on it this weekend!

I wanted to share a card that I made awhile ago, but haven't had a moment to get it on my blog. It seemed like the perfect time, as I've used the Diagonal Stitched Rectangles & Inverted Stitched Scallop Circles sets that happen to be on sale this weekend, along with the Folk Hummingbird stamps & coordinating dies.
I started by stamping the images to Strathmore Bristol cardstock in VersaFine onyx black ink. Then I colored them in with my Zig Clean Color Real Brush Markers. I have the full set of 90, which I've only been able to find on Amazon - it is a pretty good price however, and I LOVE having the full set. I don't use Copic Markers, but do use these in the same way as Copics...and have just found that it suits me & my style. I did add a little bit of water when coloring the hummingbird, in order to get the colors to run together a little bit.


Next I blended a blue oxide background to a panel of white cardstock trimmed down to 4x5.25. I used Tumbled Glass & Peacock Feather, and blended it in a gradient fashion where I knew the circle cut-out would be. Then I diecut another panel of white cardstock with the Diagonal Stitched Rectangle die first, then the Inverted Stitched Circle. You could probably do them together, but my preference is to diecut things like this separately just to have a little more control over it.
I stamped the sentiment underneath the circle in onyx black ink, then mounted both the ink blended & diecut panels to the front of a teal A2 card base with foam adhesive.


Next I adhered the floral element along the left side of the circle, then added the hummingbird to the other side. I popped up a couple areas with foam dots on these images, just to add a little bit of extra dimension. I use foam dots that are 1/16" thick, so it is quite subtle.


To finish the card, I added shimmer to the images with a Tonic Aqua Shimmer pen, then accented with a trio of our Essentials: Jewels.

That is all that I have for you today! If you love our Essentials dies, this is a great weekend to start building your collection by starting with 15% off Essentials 1. Don't forget to use the code 15OFFESS1 upon checkout!
I've updated my CRAFTY SALE page, with info on some new releases, and great sales I've found (& taken advantage of) for the weekend!
I wanted to invite you to follow me on social media before you move on with your day. I would love to be crafty friends online! I've been adding a lot more to my IG Stories lately, and have plans to keep that up. I hope you will join me!
Have a wonderful rest of your Saturday!
SUPPLY LIST
For your shopping convenience, all products are linked below, including affiliate linking when possible - this allows small compensation for me at no cost to you. I typically link to 2-3 sites, in hopes that your preferred retailer will be among them. I only support legitimate retail sites, that are true partners to stamp, die and scrapbooking wholesalers.
For your shopping convenience, all products are linked below, including affiliate linking when possible - this allows small compensation for me at no cost to you. I typically link to 2-3 sites, in hopes that your preferred retailer will be among them. I only support legitimate retail sites, that are true partners to stamp, die and scrapbooking wholesalers.

Happy Saturday, friends! I hope that you are having a wonderful weekend so far. I wanted to pop in today, because I had a moment this morning to create a couple of cards. I don't often create "just because", but it was so nice to use this beautiful piece that I watercolored in Effie's class at {stamp} JunkieFest 2019. This was a 3 day stamping event that I did some work at for Pinkfresh Studio, but also personally took some classes. It is organized by the founders of Stamp Junkies, which is a fantastic Facebook group for those that love stamping. If you haven't joined, I highly recommend it!
I took Effie's (owner of The Ton clear stamps) 4 hour class, and then proceeded to use about 2 other hours in a different class to finish it. Granted, I was also watching Effie at times while she taught and also chatting with the wonderful ladies at my table. I am super comfortable with watercolor, but I really LOVED learning this technique with Effie, and using a product by Ken Oliver called Color Burst. I've never used them before, and they were quite fun! When I got home, I added some titanium white splatters to the watercolor piece, which just tends to be part of my style.
I'm never going to be able to explain in my own words this fun watercolor technique, so I highly suggest subscribing and watching all the videos on The Ton's YouTube channel. Effie does a wonderful job in her videos, and you will learn far more there than you will here. Lol! I'm just going to share the pretty final pieces!

The floral image is from the Peony Dreams Cluster stamp set, and is quite large. I stamped & heat embossed it in Brutus Monroe Gilded embossing powder to a 6x6 block of Arches cold pressed watercolor paper. I highly suggest using a MISTI stamping platform when using this paper, as it is quite textured. I typically stamp it 3 times to make sure I get a good impression.
I'm an A2 sized card girl, so I ended up trimming it down to fit. That meant I trimmed off a chunk of time spent, and I just couldn't let it go to waste. So I fussy cut the remaining section, then created the card below. I did a mix of stamping & heat embossing for the sentiment from the You've Got This stamp set to a scrap of matching Arches watercolor paper. I adhered it to the middle of an A2 card base created from Bazzill Basic Candy Heart cardstock, then framed it in DCWV glitter paper using the Pretty Frames die. Both the sentiment & diecut set are from Pinkfresh Studio. I don't get to mix manufacturers very often, so it is fun when I do!


This card is definitely the star of the show, with the big floral element and Effie's watercolor technique. As I mentioned above, I used Ken Oliver Color Burst for the first time, and I used the Caribbean Brights set. I shop mostly at three places, and I could only find them on Amazon. Speaking of Amazon, I also wanted to share a water brush set that I purchased at the last minute. It is this Ohuhu 6 pack, and considering it's $10 price point...I was skeptical. But I LOVE them. I had yet to find a water brush that I actually liked, and these ones hit the mark. And I love that you get all the different sizes & styles in this 6 pack.
I kept the focus on the watercolor peony on this card, just embossing the sentiment from the Large Peony 4 stamp set to a strip of vellum, then attaching to the bottom. I accented with some Studio Katia Iridescent Cones that I received in my super generous swag bag from the JunkieFest 2019 event. I can't seem to find them anywhere for purchase, but you could easily switch them out with a jewel or gem you have on hand. I also accented the first card with some Essentials: Jewels mix from Pinkfresh Studio.


I also added some shimmer to the floral piece using a Tonic Aqua Shimmer pen. This is another touch that just lends to my style, and could definitely be left off if you don't love glitter. Although, it is very subtle, but gives the card some beautiful shine in different light.

That is all I have for you today! I wanted to invite you to follow me on social media if you'd like. I would love to be crafty friends!
Have a great rest of your holiday weekend!
SUPPLY LIST
For your shopping convenience, all products are linked below. {Includes affiliate linking where possible - this allows small compensation for me at no cost to you. Never fear - I will only ever link to products that I truly love & use!}

Happy Thursday, crafty friends! Welcome to day 4 of Sweet Peek Week for SugarPea Designs, and we are revealing adorable products from the Spring release all week long!

I will get all the blog hop info to you below, but how about we get to
my card first? Today we are showcasing this cute new stamp & die set
called Sprout Bloom Grow. This is such an adorable stamp set, with little critters popping out from planters or a wellie...so perfect for spring! I focused on the adorable bunny, and lots of florals for my card.


To start, I stamped all the critters in onyx black Versafine twice. If
you are comfortable with your coloring skills, then you could just stamp
once. I am not, so stamping them twice allows me to make mistakes. And
if I have some leftover critters, they can be used on my next card! I
colored them in with Zig Clean Color Real Markers in a multitude of
colors - I have the full set of 90 because, well...full set syndrome.
Lol! Once they were all colored, I cut them out with their coordinating
diecuts.


Then I ink blended the background with distress oxides in Tattered Rose, Worn Lipstick and Shabby Shutters. I diecut it with the scalloped frame from Card Front Elements Builder 1, stamped the sentiment to the upper left corner, then adhered it to an A2 white card base with foam adhesive.
Then I arranged all the stamped & colored elements to the bottom of the ink blended panel, popping some up with foam dots. I added some shimmer to the stamped images with an Aqua Shimmer Pen in Midas Touch. Finally I accented the card front with some jewels!


That is all I have for Day 4 of Sweet Peek Week! This adorable
stamp & die sets will go live in the SugarPea Designs shop on Friday
at 6pm EST.
Blog Hop Link List
Blog Hop Link List
Amy Kolling
Jeanne Jachna
Lea Lawson
Kelly Lunceford
Kerin Sylvester
Raluca Vezeteu
Simonne Clay
Stephanie Beauchemin
Tatiana Trafimovich
Vera Yates
Jeanne Jachna
Lea Lawson
Kelly Lunceford
Kerin Sylvester
Raluca Vezeteu
Simonne Clay
Stephanie Beauchemin
Tatiana Trafimovich
Vera Yates
Today you can enter for your chance to win the Sprout Bloom Grow stamp set! You get extra entries by commenting on all the blogs above.
That is all I have for you today! I also wanted to invite you to follow me on social
media. I would love to be crafty friends!
Have a great start to your week, and happy hopping!

Happy Friday, crafty friends! It's always a happy day when we are celebrating a brand new release from Simon Says stamp, right?! Their latest collection is called Fresh Bloom, and it is full of lovely products! Simon is doing a free Lucky to Know You die as a gift with purchase promotion - just use the code FRBLM89 upon checkout to take advantage while supplies last! The code will expire on Sunday, 03/10 at 11:59 pm ET.

This is day 1 of the Fresh Bloom Blog Hop, and we've got quite the lineup for you! I will put all of the blog hop details at the end of my post, but how about we get to my cards first? I've focused on the adorable Bunny Wishes stamp set, which is 6x8 in size and SO cute! Check it out!


The first thing I did was blend the clouds using oxide inks in Spun Sugar, Picked Raspberry, Tumbled Glass and Broken China.
Then I stamped the bunny & balloons to white cardstock in onyx black Versafine. Next I colored in the image with Zig Clean Color Real Brush Markers, then fussy cut it. This stamp set has coordinating dies, but I did not receive them. Seriously - just get the dies. Lol! I'm so not good at fussy cutting, but it had to be done!


Next I stamped & heat embossed parts of the sentiment directly to the ink blended background, then adhered it to an A2 white cardbase with foam adhesive. Then I adhered the bunny image to the front with foam dots. I stamped the final part of the sentiment to white cardstock and trimmed into a thin strip. I adhered it directly below the word happy, and then to finish I accented with jewels and added shimmer to the balloons.


That is what I have for you today! How about we get to all the fun blog hop info now?!
PRIZES:
Simon Says Stamp is giving away a $25 coupon to every stop on the hop from the blog comment section. They will choose the winners and post on the Simon Says Stamp store blog on Wednesday. Winners can email SSS to claim their prize.
BLOG HOP LINK LIST:
Simon Says Stamp is giving away a $25 coupon to every stop on the hop from the blog comment section. They will choose the winners and post on the Simon Says Stamp store blog on Wednesday. Winners can email SSS to claim their prize.
BLOG HOP LINK LIST:
Be sure to hop
along and leave comments along the way for your best chance to win one
of the prizes!
Simon Says Stamp Blog
Jennifer McGuire
Kristina Werner
Cathy Zielske
Nina-Marie Trapani
Nichol Spohr
Jessica Frost-Ballas
Suzy Plantamura
Lisa Addesa
Amy Rysavy
Simon Says Stamp Blog
Jennifer McGuire
Kristina Werner
Cathy Zielske
Nina-Marie Trapani
Nichol Spohr
Jessica Frost-Ballas
Suzy Plantamura
Lisa Addesa
Amy Rysavy
Wow....what a lineup that is! I know I am excited to grab a cup of coffee and see what everyone else created!
Finally, if you'd like to see even MORE inspiration from this release, check out the Fresh Bloom Collection Gallery. And be sure to link up YOUR creations too!
It looks like I am the end of the hop, but before you move alon, I wanted to invite you to follow me on social media. I would love to be crafty friends!
Alright friends! Happy hopping, and happy Friday!
SUPPLY LIST
For your shopping convenience, all products are linked below. {Includes affiliate linking where possible - this allows small compensation for me at no cost to you. Never fear - I will only ever link to products that I truly love & use!}
For your shopping convenience, all products are linked below. {Includes affiliate linking where possible - this allows small compensation for me at no cost to you. Never fear - I will only ever link to products that I truly love & use!}
**Will be up soon. Having some technical difficulties.**

Happy Monday, crafty friends! Today is the start of Sweet Peek Week for SugarPea Designs, and we are revealing adorable products from the Spring release all week long!


To start I stamped all of the critters, balloons and banners to 130 LB cougar white cardstock in onyx black Versafine ink {SSS | EH}. Then I set them aside to let the ink dry & set up before coloring them. While the ink dried, I blended the cloud background in the following Distress Oxide ink colors: Festive Berries, Worn Lipstick & Tattered Rose (all linked at the end of the post). Ever since Festive Berries released, this has been a go-to blending trio for me...and it's perfect for Valentine's Day! Once the ink blending was finished, I spritzed it with some Heidi Swapp shimmer spray and set aside to dry.


Next I colored all the images using my Zig Clean Color Real Brush Marker set. I have the full set of 90, which I purchased on Amazon. This is their complete set of colors, and I really love having it! I utilize them as you would Copics quite often, and only blend with water if I feel like I got too much color in an area, or if I am creating a watercolor background. I used the following colors on my images (separate colors are linked at the end of my post to both SSS & EH):
Elephant: pale grey, pale pink, blender
Banners: light grey. pale grey, blender
Boy Bunny/Number/Blue Heart: light blue, pale pink, blender
Girl Bunny/Red & Pink Hearts: carmine red, light carmine, pale pink, blender
Once the coloring set, I cut each image out with their coordinating diecut.


Next I put the cloud background into my MISTI {SSS | EH}, then arranged the colored pieces to it so I had a guide for the banner stick & balloon strings. I stamped them directly to the cloud background in onyx black Versafine ink.
Then I mounted the blended cloud background to the front of a white A2 card base with foam adhesive. I added some shimmer to the colored images with a Midas Touch Aqua Shimmer pen {SSS | EH}, and finished by accenting the cards with my signature iridescent jewels.


That is all I have for Day 1 of Sweet Peek Week! These two adorable stamp & die sets will go live in the SugarPea Designs shop on Friday at 6pm EST.
Blog Hop Link List
Amy Kolling
Jeanne Jachna
Lea Lawson
Kelly Lunceford
Kerin Sylvester
Raluca Vezeteu
Stephanie Beauchemin
Tatiana Trafimovich
Vera Yates
Jeanne Jachna
Lea Lawson
Kelly Lunceford
Kerin Sylvester
Raluca Vezeteu
Stephanie Beauchemin
Tatiana Trafimovich
Vera Yates
Today you can enter for your chance to win the Elephant Parade stamp set! You get extra entries by commenting on all the blogs above.
That is all I have for you today! Before I close, I wanted to mention that there are recent updates on my CRAFTY SALES page, so head over there to check them out. I also wanted to invite you to follow me on social
media. I would love to be crafty friends!

Have a great start to your week, and happy hopping!
SUPPLY LIST
For your shopping convenience, all products are linked below. {Includes affiliate linking where possible - this allows small compensation for me at no cost to you. Never fear - I will only ever link to products that I truly love & use!}
For your shopping convenience, all products are linked below. {Includes affiliate linking where possible - this allows small compensation for me at no cost to you. Never fear - I will only ever link to products that I truly love & use!}
Subscribe to:
Posts (Atom)


Social Icons