

....is the set I picked out from Gina K Designs, who is our sponsor this week at CPS. And I want to rename this set to "Warm, Wonderful & Freaking Awesome!" I had so much fun using it....I ended up making a bunch of cards with it. Which I am going to share with you today!! So, bare with the long post.....because I am going to make it worth your while. Details for a giveaway will be at the very end of the post!!! So, here we go!
This is my card for this week's sketch at CPS. Isn't the sweater so ca-ute!! I love it!
Instructions: Fold kraft cardstock in half to make card base and round bottom corners. Round bottom corners of a white cardstock block and adhere to the front. Attach blue paper frill to a strip of winter patterned paper, and adhere to the front. Accent strip with jewel snowflake, ribbon, and large white puff. Stamp the sweater and hat image to blue snowflake paper and cut out. Adhere to the front of the card, and accent with white puffs and jewels. Stamp the sentiment directly to the white cardstock, and accent with jewels.
This card is based on Mojo Monday 120 sketch, and the current Just Buggin' challenge 19 to use your Cricut & stamping . Can I just say that this ribbon rocks for tying bows. I purchased it at Michael's during their Thanksgiving sale...thankfully I bought two spools of it because I love it. And I got it for next to nothing....gotta love that!

Instructions: Fold kraft cardstock in half to make card base and round bottom corners. Add red paper frill to the bottom of the hat paper strip, and adhere to the front. Ink the edges of a block of dotted paper, and adhere to the front. Add the rub-on mittens to the bottom of the card. Add the ribbon to the front, and finish with a bow. Cut the scalloped circle and its layers at 2 1/4" from red & white cardstock using a Cricut and Winter Woodlands cartridge. Layer together, and stamp the sentiment to the white circle. Adhere the front. Stamp the hat and mittens to patterned paper, and cut out. Layer together and adhere to the front. Accent with jewels and a white puff.
This next card is based on Kazan's Sketch 43 at 2 Sketches 4 U this week. They always have such fabulous sketches every week.

Instructions: Fold red snowflake paper in half to make card base, and round the right hand corners. Ink the edges of the card with warm red chalk ink. Ink the edges of a strip of striped paper with warm red chalk ink, and adhere blue paper frill to the right side. Adhere the entire block to the left side of the card. Round the right hand corners of a block of kraft cardstock, and adhere to the front. Stamp the three snowflakes in frost white pigment ink to the kraft block. Stamp the sentiment in ruby pigment ink directly below the snowflakes. Accent the snowflakes with blue pearls. Add ribbon across the bottom of the card. Top with a bow, button, twine, and pins.
This cutie is based on sunday's sketch at 365 cards. I used a mix of Gina K & RBD stamps on this one...I think they go together really well! The RBD stamps are the marshmallows & the steam flourishes.

Instructions: Fold kraft cardstock in half to make card base. Round the top corners of white and red cardstock, and adhere together. Attach to the front of the card. Punch a border to a strip of red snowflake paper, and adhere to the top of a white diamond paper block. Adhere the entire piece to the front. Tie ribbon around the bottom of the card, and accent with a button and twine. Accent the seam with a strip of brown jewels. Stamp the cocoa mug to dotted paper with chestnut pigment ink, cut out, and adhere. Accent with red jewels and glitter. Stamp the steam, sentiment, and marshmallows directly to the red cardstock with frost white pigment ink. Accent with jewels and pearls.
And the last one...but definitely not the least! This uses Get Sketchy 19 and current challenge at Bitten By The Bug 2 to use the "In Style' cut from the Graphically Speaking cartridge. I am so happy that Heather Binnie decided to take over when Regina needed to step away from BBTB1. I have always loved checking out the inspiration from the blog, and hope to participate much more this year!

Instructions: Fold kraft cardstock in half to make card base. Round the left corners of a block of winter paper and adhere to the front. Cut a curve from red snowflake paper, and adhere to the right side. Cut the "in style" image and its layers from kraft cardstock/dotted paper at 2 3/4" using a Cricut and Graphically Speaking cartridge. Layer them together, and back with red cardstock. Adhere to the front, and add the word "winter" to the top with white glitter stickers. Stamp the hat and mittens to blue snowflake paper and cut out. Adhere to the front of the card and accent with jewels and white puffs. Accent the curve with red and blue jewels.
Are you still with me?? I know, I know....this is a lot of stuff! I am almost to the giveaway....I promise. So, Josh and I went on a little date last night to see this:
 I talked about how it was sold out when we went to see it this weekend in an earlier post. Well, it was totally meant to be because we ended up with free tickets to see it! Josh got them from work because they were about to expire....so we got to go on a date for free! (well, kind-of. We did get some popcorn and a drink.) Gotta love that!! The movie was SO good....I would definitely recommend seeing it if you haven't.
Alright....you have earned your chance at this giveaway!! So here are the details. I have one sheet of each paper from the Imaginisce Polar Expression collections to giveaway today.
 As you can tell....I love this paper. LOVE it. And I want someone else to be able to love using it too! So, the details of the giveaway are simple. Number one: become a follower of my blog if you aren't yet. And number two: leave me a comment. Easy peasy, right? And to make it really fun....I will draw the winner next Thursday.....which also happens to be my birthday!! I love giving and receiving gifts...so I thought it would be nice to give something to someone else on my birthday.
Well, I need to go work on the laundry (still loving the turquoise) and clean the kitchen up. I really hope that you are having a wonderful week so far! ♥
Until later,
~Lea
This is my card for this week's sketch at CPS. Isn't the sweater so ca-ute!! I love it!

"You Warm My Heart" supplies:
Cardstock: Bazzill Basics
Paper: :Imaginisce
Paper Frill: Doodlebug Designs
Jewels: Basic Grey (snowflake), Kaiser Craft (red/light blue)
Puff Balls: Darice Inc.
Ribbon: Making Memories
Stamps: Gina K Designs (Warm & Wonderful)
Ink: Clearsnap (Pigment- Cranberry, black)
Corner Rounder: EK Success
Instructions: Fold kraft cardstock in half to make card base and round bottom corners. Round bottom corners of a white cardstock block and adhere to the front. Attach blue paper frill to a strip of winter patterned paper, and adhere to the front. Accent strip with jewel snowflake, ribbon, and large white puff. Stamp the sweater and hat image to blue snowflake paper and cut out. Adhere to the front of the card, and accent with white puffs and jewels. Stamp the sentiment directly to the white cardstock, and accent with jewels.
This card is based on Mojo Monday 120 sketch, and the current Just Buggin' challenge 19 to use your Cricut & stamping . Can I just say that this ribbon rocks for tying bows. I purchased it at Michael's during their Thanksgiving sale...thankfully I bought two spools of it because I love it. And I got it for next to nothing....gotta love that!

"Consider Yourself Hugged" supplies:
Cardstock: Bazzill Basics
Paper/Rub-ons: Imaginisce
Paper Frill: Doodlebug Designs
Jewels: Zva Creative
White puff balls: Darice Inc.
Ribbon: Michael's
Stamps: Gina K Designs
Ink: Clearsnap (Pigment: Cranberry, Chestnut & Chalk: lime pastel)
Diecut Machine: Cricut Expression by Provo Craft
Diecut Cartridge: Winter Woodland by Provo Craft
Corner Rounder: EK Success
Instructions: Fold kraft cardstock in half to make card base and round bottom corners. Add red paper frill to the bottom of the hat paper strip, and adhere to the front. Ink the edges of a block of dotted paper, and adhere to the front. Add the rub-on mittens to the bottom of the card. Add the ribbon to the front, and finish with a bow. Cut the scalloped circle and its layers at 2 1/4" from red & white cardstock using a Cricut and Winter Woodlands cartridge. Layer together, and stamp the sentiment to the white circle. Adhere the front. Stamp the hat and mittens to patterned paper, and cut out. Layer together and adhere to the front. Accent with jewels and a white puff.
This next card is based on Kazan's Sketch 43 at 2 Sketches 4 U this week. They always have such fabulous sketches every week.

"Winter's Butterfly" supplies:
Cardstock: Bazzill Basics
Paper: Imaginisce
Paper Frill/Button: Doodlebug Designs
Ribbon: Michael's
Twine: Darice Inc.
Pins: Maya Road & craft supply
Pearls: Kaiser Craft
Stamps: Gina K Designs
Ink: Clearsnap (Pigment: frost white, ruby & Chalk: warm red)
Corner Rounder: EK Success
Instructions: Fold red snowflake paper in half to make card base, and round the right hand corners. Ink the edges of the card with warm red chalk ink. Ink the edges of a strip of striped paper with warm red chalk ink, and adhere blue paper frill to the right side. Adhere the entire block to the left side of the card. Round the right hand corners of a block of kraft cardstock, and adhere to the front. Stamp the three snowflakes in frost white pigment ink to the kraft block. Stamp the sentiment in ruby pigment ink directly below the snowflakes. Accent the snowflakes with blue pearls. Add ribbon across the bottom of the card. Top with a bow, button, twine, and pins.
This cutie is based on sunday's sketch at 365 cards. I used a mix of Gina K & RBD stamps on this one...I think they go together really well! The RBD stamps are the marshmallows & the steam flourishes.

"Warm Thoughts" supplies:
Cardstock: Bazzill Basics
Paper: Imaginisce
Stamps: Gina K Designs & Renaissance By Designs (Season's Best, Coffee & Tea Add-on)
Ink: Clearsnap (Pigment: frost white, chestnut)
Jewels: Doodlebug Designs (red, brown) & Glitz Designs (brown strip)
Pearls: Kaiser Craft
Ribbon: Michael's
Twine: Darice Inc.
Button: Doodlebug Designs
Glitter: Ranger Stickles
Corner Rounder: EK Success
Border Punch: Martha Stewart Crafts
Instructions: Fold kraft cardstock in half to make card base. Round the top corners of white and red cardstock, and adhere together. Attach to the front of the card. Punch a border to a strip of red snowflake paper, and adhere to the top of a white diamond paper block. Adhere the entire piece to the front. Tie ribbon around the bottom of the card, and accent with a button and twine. Accent the seam with a strip of brown jewels. Stamp the cocoa mug to dotted paper with chestnut pigment ink, cut out, and adhere. Accent with red jewels and glitter. Stamp the steam, sentiment, and marshmallows directly to the red cardstock with frost white pigment ink. Accent with jewels and pearls.
And the last one...but definitely not the least! This uses Get Sketchy 19 and current challenge at Bitten By The Bug 2 to use the "In Style' cut from the Graphically Speaking cartridge. I am so happy that Heather Binnie decided to take over when Regina needed to step away from BBTB1. I have always loved checking out the inspiration from the blog, and hope to participate much more this year!

"Winter In Style" supplies:
Cardstock: Bazzill Basics
Paper: Imaginisce
Stickers: Making Memories
Jewels: Creative Cafe
White Puff Balls: Darice Inc.
Stamps: Gina K Designs
Ink: Clearsnap (Pigment: Cranberry)
Corner Rounder: EK Success
Instructions: Fold kraft cardstock in half to make card base. Round the left corners of a block of winter paper and adhere to the front. Cut a curve from red snowflake paper, and adhere to the right side. Cut the "in style" image and its layers from kraft cardstock/dotted paper at 2 3/4" using a Cricut and Graphically Speaking cartridge. Layer them together, and back with red cardstock. Adhere to the front, and add the word "winter" to the top with white glitter stickers. Stamp the hat and mittens to blue snowflake paper and cut out. Adhere to the front of the card and accent with jewels and white puffs. Accent the curve with red and blue jewels.

Alright....you have earned your chance at this giveaway!! So here are the details. I have one sheet of each paper from the Imaginisce Polar Expression collections to giveaway today.

Well, I need to go work on the laundry (still loving the turquoise) and clean the kitchen up. I really hope that you are having a wonderful week so far! ♥
Until later,
~Lea

...is beautiful! I have two projects to share with you today, and they both feature cuts from the Winter Woodland cartridge. I have wanted to use the figure skater cut since the first time I saw it....but never had a good idea for it until now. And even paper figure skaters are beautiful...I just love this cut!!
Both cards fit the current challenge at The Pink Elephant....except for one small detail. When I read the challenge this afternoon, I looked at part of it wrong. The challenge is to use two patterned papers, 3 buttons and snowflakes....for some reason I read it as "a" button...not 3. So, my cards only have a button on each one...hopefully I won't get thrown to the sharks. ;) Tee hee! It is also based on Taylored Expression Sketch #96...which is a FAB sketch. Check it out if you haven't already!
Instructions: Fold white cardstock in half to make card base and round the bottom corners. Punch holes in the shape of an arc to a block of kraft cardstock and round the bottom corners. Adhere to the front. Round the bottom corners of a block of snowflake paper and adhere to the front. Round the top corners of a block of white cardstock and adhere to the front. Add ribbon around the seam, and tie a button to the middle of the bow with twine. Cut the figure skater and layers at 4.5" using the Cricut Expression and Winter Woodland cartridge. Adhere together and attach to the front of the card. Accent with white puff balls and pearls. Stamp "Baby It's Cold Outside" inside the arc using ruby pigment ink. Finish the sentiment with letter stickers on the white cardstock block.
This next card uses the sketch for Just Us Girls Challenge 14. I actually did this card twice. I did it last night with different papers....and it was a hot mess. It was awful...I hated it. So, this afternoon I sat down with it to figure out what I didn't like about it. For this version, I used completely different papers, I didn't use the background layer for the text, and a different accent cut....and it is SO much better. I think the biggest difference is the papers though....sometimes colors and papers just don't work out!! So remember that....if you hate a card you make, try to rework with different product. Now I love this card!!

Instructions: Fold kraft cardstock in half to make card base. Round the corners of a patterned paper block and adhere to the front. Punch a scallop border to brown cardstock, and cut a thin strip. Adhere to the bottom of a strip of snowflake paper, and adhere to the front. Round the top corners of a block of kraft cardstock, and adhere to the front. Cut the lettering and shadows at 3.5" using the Cricut Expression and Winter Woodlands cartridge. Layer together and adhere to the kraft block. Add a ribbon and bow to the right side of the card, and accent with a button & pins. Cut the ice skate accent and layers at 2" using the Cricut Exression and Winter Woodlands cartridge. Layer together, accent with pearls, and adhere to the front. Finish accenting the card with jewels.
I bought something at Target tonight that was just meant to be. I have wanted one of these for three years, but wasn't willing to cough up $250 for one:

Well, Josh and I went to Target tonight to pick up some household items. We were casually meandering through the Christmas stuff after we picked up our necessary items...not committing to anything even though it was all 75% off. Then my eyes fixed on this box....one lonely little tree box sitting on a shelf beckoning me....calling my name....whispering "you know you want to buy me". And it happened to be the EXACT white tree I have wanted for three years...and I got it for 62 bucks. YIPPEE! I was (and still am) a giddy little thing right now...it does kind-of suck that it has to go in the crawl space for now. But, it gives me something to look forward to!!
Well, I better get going for now. I hope that your Monday after New Year's has been a fabulous one!! Talk to you soon! ♥
Until later,
~Lea
Both cards fit the current challenge at The Pink Elephant....except for one small detail. When I read the challenge this afternoon, I looked at part of it wrong. The challenge is to use two patterned papers, 3 buttons and snowflakes....for some reason I read it as "a" button...not 3. So, my cards only have a button on each one...hopefully I won't get thrown to the sharks. ;) Tee hee! It is also based on Taylored Expression Sketch #96...which is a FAB sketch. Check it out if you haven't already!

"Baby It's Cold Outside" supplies:
Cardstock: Bazzill Basics
Paper: Imaginisce
Stickers: Making Memories
Pearls: Kaiser Craft
Button: Doodlebug Designs
Ribbon: Michael's brand
Twine: Darice Inc.
Stamp: Renaissance By Design (Tis The Season set)
Ink: Clearsnap (Pigment: Ruby)
Hole Punch: We R Memory Keepers (Cropodile)
Diecut Machine: Cricut Expression by Provo Craft
Diecut Cartridge: Winter Woodland by Provo Craft
Instructions: Fold white cardstock in half to make card base and round the bottom corners. Punch holes in the shape of an arc to a block of kraft cardstock and round the bottom corners. Adhere to the front. Round the bottom corners of a block of snowflake paper and adhere to the front. Round the top corners of a block of white cardstock and adhere to the front. Add ribbon around the seam, and tie a button to the middle of the bow with twine. Cut the figure skater and layers at 4.5" using the Cricut Expression and Winter Woodland cartridge. Adhere together and attach to the front of the card. Accent with white puff balls and pearls. Stamp "Baby It's Cold Outside" inside the arc using ruby pigment ink. Finish the sentiment with letter stickers on the white cardstock block.
This next card uses the sketch for Just Us Girls Challenge 14. I actually did this card twice. I did it last night with different papers....and it was a hot mess. It was awful...I hated it. So, this afternoon I sat down with it to figure out what I didn't like about it. For this version, I used completely different papers, I didn't use the background layer for the text, and a different accent cut....and it is SO much better. I think the biggest difference is the papers though....sometimes colors and papers just don't work out!! So remember that....if you hate a card you make, try to rework with different product. Now I love this card!!

"Warm Winter Wishes" supplies:
Cardstock: Bazzill Basics
Paper: Imaginisce
Ribbon: Michael's brand
Button: Doodlebug Designs
Pins: Making Memories & Maya Road
Pearls/Jewels: Zva Creative
Corner Rounder: EK Success
Border Punch: Stampin Up
Diecut Machine: Cricut Expression by Provo Craft
Diecut Cartridge: Winter Woodland by Provo Craft
Instructions: Fold kraft cardstock in half to make card base. Round the corners of a patterned paper block and adhere to the front. Punch a scallop border to brown cardstock, and cut a thin strip. Adhere to the bottom of a strip of snowflake paper, and adhere to the front. Round the top corners of a block of kraft cardstock, and adhere to the front. Cut the lettering and shadows at 3.5" using the Cricut Expression and Winter Woodlands cartridge. Layer together and adhere to the kraft block. Add a ribbon and bow to the right side of the card, and accent with a button & pins. Cut the ice skate accent and layers at 2" using the Cricut Exression and Winter Woodlands cartridge. Layer together, accent with pearls, and adhere to the front. Finish accenting the card with jewels.
I bought something at Target tonight that was just meant to be. I have wanted one of these for three years, but wasn't willing to cough up $250 for one:

Well, I better get going for now. I hope that your Monday after New Year's has been a fabulous one!! Talk to you soon! ♥
Until later,
~Lea

....on both of the items I have to share with you today. I have two cards to feature today, and both fit the Crazy 4 Challenges 18 this week to use polka dots on your project. This first card also uses Laura's Sketch 42 at 2 Sketches 4 U....just barely making this one on time! ;)
Instructions: Fold red cardstock in half to make card base. Round the corners of a block of snowflake flocked paper and adhere to the front. Punch an apron lace border to the right side of a block of black dotted paper and adhere to the front Add a strip of sherry satin dot ribbon to the front. Adhere the vintage image to the front, and then layer a glittered snowflake to the upper right side of it. Top with a bow and metal snowflake. Accent the card with adhesive pearls and jewel flourishes.
This next card is based (a tad loosely) on the this sketch that was posted a few weeks ago at the Clean & Simple Stamping blog. I love these glittery golden snowflakes....I have had them in my stash forever and never used them until now. You should see how much they glitter in real life....it is fabulous!!

Instructions: Fold gold snowflake paper in half to make card base, and round the right hand corners. Round the right hand corners of a block of white cardstock and adhere to the front. Punch four 1 1/4" circles from dotted paper and ink the edges with lime pastel chalk ink. Adhere to the left side of the white cardstock block. Add glittery gold snowflake accents to the middle of each circle, and add a pearl to the middle of each one. Stamp the sentiment to the lower right corner of the white cardstock using Amber Satin pigment ink.
Have you had a fun couple of days in 2010? We really have so far! Last night we went to dinner with a group of friends at a local restaurant/bar called the Iron Horse. They make the BEST buffalo chicken salad, which is what I had of course!! Then two of our friends, Grant & Meagan, came over afterward for cake and daiquiris. After sugar overload and an intense conversation about butter beer from the Harry Potter series...I think we were all ready to go to bed! Tee hee! :) I even took a couple photos....here they are!

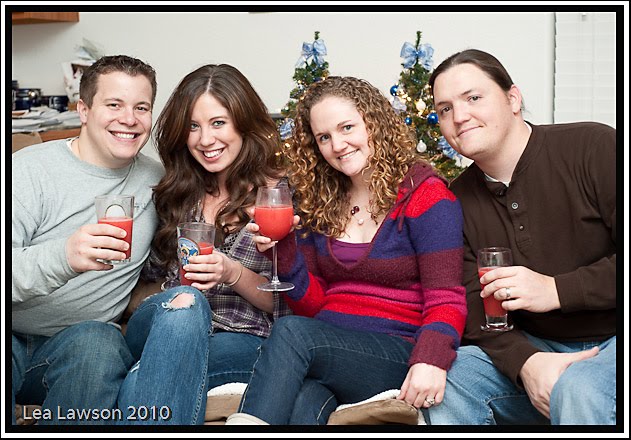
And I desperately need to clean off that corner of my counter. I think this photo of us together might just force me to do it...because I couldn't crop it out without cropping off Grant's head! And that cake is FABULOUS! I found the recipe forever ago, and most of you probably know it already...but it is called Better Than Sex cake in case you need to google it. SO good. Sorry if the name offended anyone!
Today we tried to go see Sherlock Holmes, but the only time that worked for us was sold out. :( Oh well...we will just have to go another day. We did go make a purchase that was necessary, picked up some food, and came home to watch this instead:

It was okay....not the greatest movie I have ever seen, but at least some entertainment! :) Josh works super early in the morning, so once he hits the hay....I am going to spend some more time in my craft room! I totally cleaned up my desk and reorganized it today....so I am feeling inspired!!
And I will leave you with this. I saw this infomercial awhile back, and just howled. Watch the first 15 seconds of it over and over again.....and you will most likely start crying with laughter. I know that I did, and my husband did too. Because really....who handles them that way! (You will know what I mean when you see it!)
On that note, I am signing off! If you don't think it is funny....please don't tell me that. Let me live in my little world where it really is super funny....I'll feel better about myself! Tee hee! Have a wonderful evening! ♥
Until later,
~Lea

"Blessed Snowflake" supplies:
Cardstock: Bazzill Basics
Paper: Making Memories & Martha Stewart Crafts
Vintage Image: Crafty Secrets
Jewels/Pearls: Zva Creative
Glitter: Making Memories
Corner Rounder: EK Success
Border Punch: Fiskars (Apron Lace)
Metal: craft supply
Instructions: Fold red cardstock in half to make card base. Round the corners of a block of snowflake flocked paper and adhere to the front. Punch an apron lace border to the right side of a block of black dotted paper and adhere to the front Add a strip of sherry satin dot ribbon to the front. Adhere the vintage image to the front, and then layer a glittered snowflake to the upper right side of it. Top with a bow and metal snowflake. Accent the card with adhesive pearls and jewel flourishes.
This next card is based (a tad loosely) on the this sketch that was posted a few weeks ago at the Clean & Simple Stamping blog. I love these glittery golden snowflakes....I have had them in my stash forever and never used them until now. You should see how much they glitter in real life....it is fabulous!!

"Golden Snowflake" supplies:
Cardstock: Bazzill Basics
Paper: American Crafts
Stamps: My Sentiments Exactly (Winter Sentiments set)
Ink: Clearsnap (Pigment: Amber Satin, Chalk: Lime Pastel)
Pearls: Kaiser Craft
Snowflakes: Michael's brand
Corner Rounder: EK Success
Circle Punch: Marvy Uchida
Instructions: Fold gold snowflake paper in half to make card base, and round the right hand corners. Round the right hand corners of a block of white cardstock and adhere to the front. Punch four 1 1/4" circles from dotted paper and ink the edges with lime pastel chalk ink. Adhere to the left side of the white cardstock block. Add glittery gold snowflake accents to the middle of each circle, and add a pearl to the middle of each one. Stamp the sentiment to the lower right corner of the white cardstock using Amber Satin pigment ink.
Have you had a fun couple of days in 2010? We really have so far! Last night we went to dinner with a group of friends at a local restaurant/bar called the Iron Horse. They make the BEST buffalo chicken salad, which is what I had of course!! Then two of our friends, Grant & Meagan, came over afterward for cake and daiquiris. After sugar overload and an intense conversation about butter beer from the Harry Potter series...I think we were all ready to go to bed! Tee hee! :) I even took a couple photos....here they are!


Today we tried to go see Sherlock Holmes, but the only time that worked for us was sold out. :( Oh well...we will just have to go another day. We did go make a purchase that was necessary, picked up some food, and came home to watch this instead:

And I will leave you with this. I saw this infomercial awhile back, and just howled. Watch the first 15 seconds of it over and over again.....and you will most likely start crying with laughter. I know that I did, and my husband did too. Because really....who handles them that way! (You will know what I mean when you see it!)
Until later,
~Lea

Happy New Year my friends!!! Wow....I cannot believe how quickly 2009 flew by!! It was really an awesome year....I learned so much, had so much fun, and reached for one of the dreams closest to my heart. I can't wait to see how this year unfold, not only for myself, but for my family as well.
My blog is going to be super fun this year...packed with cards & projects, life photos, and fun randomness! I can't wait!! Just to give you a peek into how January is going to work....I am going to focus on New Year's and Winter until January 7th. Then that kicks off the week before my 30th birthday....a birthday number that I am not that excited about. BUT...I am going to look on the bright side and just have fun, and remember that I don't even look CLOSE to the age of 30! Tee hee! I am going to focus on birthday themed items for that week...and then after January 14th, my focus will be on Valentine's and Love for a whole month! I am sure I will slip other type of projects in too....but that is what my focus is for January, and half of Feb. I hope you will join me!
I have a couple cards to share with you today. I think they seemed fitting! ;) This first card is based on this week's sketch at The Sweetest Thing.... Love this one!
Instructions: Fold aqua cardstock in half to make card base. Round the corners of a block of patterned paper and adhere to the front. Add black paper frill to the bottom of a strip of paper and adhere to the front. Cut "brand spankin' new" at 2 1/4" using the Graphically Speaking cartridge and black cardstock. Cut the arrow layers from aqua cardstock and layer together. Adhere the cut to the front of the card. Add a strip of tropic satin dot ribbon right below the sentiment. Cut the "rocket" at 1 1/2" using Stand And Salute cartridge and black cardstock. This cartridge doesn't provide layers, so cut again twice at 1" from red & yellow glittered cardstock. Cut off the section you want and layer to the original cut, and adhere to the front. Cut "year" at 2" using the Designer's Calendar cartridge and pink cardstock (script feature). It's original cut says "leapyear", so cut off the portion you don't need, and adhere the other part with dimensional adhesive. Add a bow to the right side of the card, and accent with a button, jewels, and pins.
This next card was done for a few challenges! The current sketch challenge at The Pink Elephant, the Digging Deep challenge at 365 cards (I have had all this product forever, and I have never used ANY of these Cricut cuts), The Blackout challenge at Just Buggin' and the New Beginnings challenge at Daring Cardmakers. I never in a million years thought I would actually use the Hannah Montana cartridge when I pulled it out of a box from Provo Craft, unless they gave me an assignment for it. But, upon looking through it recently...it is awesome! There isn't much actually related to Hannah Montana, and the fonts are fabulous....like this star one!

Instructions: Fold black cardstock in half to make card base, and round the bottom corners. Round the bottom corners of a block of white flocked paper and adhere to the front. Punch a border to striped paper and adhere to the front. Cut the star at 2 1/2" using the Home Decor cartridge and yellow cardstock. Adhere to the front. Cut the glass at 2 1/2" using the Stretch Your Imagination cartridge and white shimmer cardstock (blackout feature). Cut the layers from yellow and black glittered cardstock. Layer together, accent with a jewel, and adhere to the front. Cut the letters at 1" using the Hannah Montana cartridge and black cardstock (rockstar option). Adhere to the front. Accent the card with star jewels.
So, did you have a great New Years Eve? We had a blast at home!! We had garlic chicken alfredo tomato pizza and champagne....we played around with slow shutter speeds on our camera while pouring the champagne....cuddled with the pups....watched football and the Red Bull No Limits thing on ESPN.....watched the movie "9" (totally weird)....and took photos together using the self timer. I was learning so much about photography last year, that I slacked on photographing our life together. I have a resolution to do that much more this year...the little moments, and big moments. So, you will be seeing more photos too! :) Here are some from our new years! And I am proving to myself that it is okay to show people photos straight out of the camera. All of these have no adjustments, other than the frame border and a quick unsharp mask in PS. I am pretty happy with how they turned out!


I have to laugh a little about the first photo collage of Bailey & Sadie. That is normally all I get from Bailey...the yorkie. He HATES the camera. So, I have to either be really quick when shooting a photo of him, or just deal with what he gives me. In the family photo...I set a treat on the camera. He totally gets it....Sadie is clueless. Tee hee!
And I don't think I ever showed you my Christmas decorations!! Here is just a small look....because I took these last night! Just of my tree and one of my table decorations. Hope you like them!

Well, 2010 is going to be a fabulous year....I can just tell!! I will be back soon with some more Winter themed projects!! Enjoy your New Year's!! ♥
Until later,
~Lea
My blog is going to be super fun this year...packed with cards & projects, life photos, and fun randomness! I can't wait!! Just to give you a peek into how January is going to work....I am going to focus on New Year's and Winter until January 7th. Then that kicks off the week before my 30th birthday....a birthday number that I am not that excited about. BUT...I am going to look on the bright side and just have fun, and remember that I don't even look CLOSE to the age of 30! Tee hee! I am going to focus on birthday themed items for that week...and then after January 14th, my focus will be on Valentine's and Love for a whole month! I am sure I will slip other type of projects in too....but that is what my focus is for January, and half of Feb. I hope you will join me!
I have a couple cards to share with you today. I think they seemed fitting! ;) This first card is based on this week's sketch at The Sweetest Thing.... Love this one!

"Brand Spankin' New Year" Supplies:
Cardstock: DCVW & Bazzill Basics
Paper: KI Memories
Paper Frill/Jewels: Doodlebug Designs
Pins: Making Memories & Maya Road
Ribbon: Renaissance By Design (Tropic Satin Dot)
Button: craft supply
Ink: Clearsnap
Diecut Machine: Cricut Expression by Provo Craft
Corner Rounder: EK Success
Instructions: Fold aqua cardstock in half to make card base. Round the corners of a block of patterned paper and adhere to the front. Add black paper frill to the bottom of a strip of paper and adhere to the front. Cut "brand spankin' new" at 2 1/4" using the Graphically Speaking cartridge and black cardstock. Cut the arrow layers from aqua cardstock and layer together. Adhere the cut to the front of the card. Add a strip of tropic satin dot ribbon right below the sentiment. Cut the "rocket" at 1 1/2" using Stand And Salute cartridge and black cardstock. This cartridge doesn't provide layers, so cut again twice at 1" from red & yellow glittered cardstock. Cut off the section you want and layer to the original cut, and adhere to the front. Cut "year" at 2" using the Designer's Calendar cartridge and pink cardstock (script feature). It's original cut says "leapyear", so cut off the portion you don't need, and adhere the other part with dimensional adhesive. Add a bow to the right side of the card, and accent with a button, jewels, and pins.
This next card was done for a few challenges! The current sketch challenge at The Pink Elephant, the Digging Deep challenge at 365 cards (I have had all this product forever, and I have never used ANY of these Cricut cuts), The Blackout challenge at Just Buggin' and the New Beginnings challenge at Daring Cardmakers. I never in a million years thought I would actually use the Hannah Montana cartridge when I pulled it out of a box from Provo Craft, unless they gave me an assignment for it. But, upon looking through it recently...it is awesome! There isn't much actually related to Hannah Montana, and the fonts are fabulous....like this star one!

"Cheers" supplies:
Cardstock: Bazzill Basics, Doodlebug Designs & Wausau
Paper: Doodlebug Designs
Jewels: Westrim Crafts
Corner Rounder: EK Success
Border Punch: Martha Stewart Crafts
Diecut Machine: Cricut Expression by Provo Craft
Instructions: Fold black cardstock in half to make card base, and round the bottom corners. Round the bottom corners of a block of white flocked paper and adhere to the front. Punch a border to striped paper and adhere to the front. Cut the star at 2 1/2" using the Home Decor cartridge and yellow cardstock. Adhere to the front. Cut the glass at 2 1/2" using the Stretch Your Imagination cartridge and white shimmer cardstock (blackout feature). Cut the layers from yellow and black glittered cardstock. Layer together, accent with a jewel, and adhere to the front. Cut the letters at 1" using the Hannah Montana cartridge and black cardstock (rockstar option). Adhere to the front. Accent the card with star jewels.
So, did you have a great New Years Eve? We had a blast at home!! We had garlic chicken alfredo tomato pizza and champagne....we played around with slow shutter speeds on our camera while pouring the champagne....cuddled with the pups....watched football and the Red Bull No Limits thing on ESPN.....watched the movie "9" (totally weird)....and took photos together using the self timer. I was learning so much about photography last year, that I slacked on photographing our life together. I have a resolution to do that much more this year...the little moments, and big moments. So, you will be seeing more photos too! :) Here are some from our new years! And I am proving to myself that it is okay to show people photos straight out of the camera. All of these have no adjustments, other than the frame border and a quick unsharp mask in PS. I am pretty happy with how they turned out!


I have to laugh a little about the first photo collage of Bailey & Sadie. That is normally all I get from Bailey...the yorkie. He HATES the camera. So, I have to either be really quick when shooting a photo of him, or just deal with what he gives me. In the family photo...I set a treat on the camera. He totally gets it....Sadie is clueless. Tee hee!
And I don't think I ever showed you my Christmas decorations!! Here is just a small look....because I took these last night! Just of my tree and one of my table decorations. Hope you like them!

Well, 2010 is going to be a fabulous year....I can just tell!! I will be back soon with some more Winter themed projects!! Enjoy your New Year's!! ♥
Until later,
~Lea
Subscribe to:
Posts (Atom)


Social Icons