

Happy Monday, crafty friends! Today is the start of Sweet Peek Week for SugarPea Designs, and we are revealing adorable products from the Spring release all week long!


To start I stamped all of the critters, balloons and banners to 130 LB cougar white cardstock in onyx black Versafine ink {SSS | EH}. Then I set them aside to let the ink dry & set up before coloring them. While the ink dried, I blended the cloud background in the following Distress Oxide ink colors: Festive Berries, Worn Lipstick & Tattered Rose (all linked at the end of the post). Ever since Festive Berries released, this has been a go-to blending trio for me...and it's perfect for Valentine's Day! Once the ink blending was finished, I spritzed it with some Heidi Swapp shimmer spray and set aside to dry.


Next I colored all the images using my Zig Clean Color Real Brush Marker set. I have the full set of 90, which I purchased on Amazon. This is their complete set of colors, and I really love having it! I utilize them as you would Copics quite often, and only blend with water if I feel like I got too much color in an area, or if I am creating a watercolor background. I used the following colors on my images (separate colors are linked at the end of my post to both SSS & EH):
Elephant: pale grey, pale pink, blender
Banners: light grey. pale grey, blender
Boy Bunny/Number/Blue Heart: light blue, pale pink, blender
Girl Bunny/Red & Pink Hearts: carmine red, light carmine, pale pink, blender
Once the coloring set, I cut each image out with their coordinating diecut.


Next I put the cloud background into my MISTI {SSS | EH}, then arranged the colored pieces to it so I had a guide for the banner stick & balloon strings. I stamped them directly to the cloud background in onyx black Versafine ink.
Then I mounted the blended cloud background to the front of a white A2 card base with foam adhesive. I added some shimmer to the colored images with a Midas Touch Aqua Shimmer pen {SSS | EH}, and finished by accenting the cards with my signature iridescent jewels.


That is all I have for Day 1 of Sweet Peek Week! These two adorable stamp & die sets will go live in the SugarPea Designs shop on Friday at 6pm EST.
Blog Hop Link List
Amy Kolling
Jeanne Jachna
Lea Lawson
Kelly Lunceford
Kerin Sylvester
Raluca Vezeteu
Stephanie Beauchemin
Tatiana Trafimovich
Vera Yates
Jeanne Jachna
Lea Lawson
Kelly Lunceford
Kerin Sylvester
Raluca Vezeteu
Stephanie Beauchemin
Tatiana Trafimovich
Vera Yates
Today you can enter for your chance to win the Elephant Parade stamp set! You get extra entries by commenting on all the blogs above.
That is all I have for you today! Before I close, I wanted to mention that there are recent updates on my CRAFTY SALES page, so head over there to check them out. I also wanted to invite you to follow me on social
media. I would love to be crafty friends!

Have a great start to your week, and happy hopping!
SUPPLY LIST
For your shopping convenience, all products are linked below. {Includes affiliate linking where possible - this allows small compensation for me at no cost to you. Never fear - I will only ever link to products that I truly love & use!}
For your shopping convenience, all products are linked below. {Includes affiliate linking where possible - this allows small compensation for me at no cost to you. Never fear - I will only ever link to products that I truly love & use!}

Part of this concept was collaborative Make and Takes, and we were partnered with Waffle Flower Crafts. I had SO MUCH FUN designing our shared project, and it really felt like we were a perfect fit. It was so amazing watching store owners & paper crafters smile as they played with our liquid watercolor on the new Water Media Mats from Waffle Flower, then stamping and assembling their cards. The best part was getting people out of their comfort zones, realizing that watercolor is different every time, and they could really create their own take on the card I created. I wish I would have had more time to take photos of all the different outcomes - I have to remember that for next year! Here we all are after two days of shared Make and Takes!

For this card set, I've combined our new Make A Wish stamp set and coordinating diecuts, with Waffle Flower's Be You Tiful stamp & die combo. These are both now available for purchase, so I thought today was a great day to share!


To start this card set, I created the backgrounds on Tim Holtz distress watercolor paper with our liquid watercolors in Bubblegum, Clementine & Sunshine (all linked below). I used my Distress Sprayer to lightly push the watercolor around, and then set them aside to dry naturally.
While they dried I stamped the florals in onyx black Versafine to 110 LB Neenah Solor White cardstock, then cut them out with the matching dies. Then I loosely watercolored them in the same colors as the background, but also added Emerald City for the leaves & greenery. Then I set those aside to dry naturally as well.


Next I stamped the cakes & cake plates in coordinating colors from Catherine Pooler inks. Then I cut them out with the matching dies, and adhered them together. With the background now fully dry, I stamped the sentiments to the bottom of each one in onyx black Versafine using my MISTI.
Then I adhered each watercolor panel to the front of an A2 card base made from Bazzill Cotton Candy cardstock, then arranged the cake & florals to the front of each one. I popped some of them up with foam dots to give the card some extra dimension.


To finish, I accented the card with some of the new Waffle Flower enamel dots in Clean & Clear, and Stardust. Finally, I added shimmer to the cake & florals with my Tonic Aqua Shimmer pen.


That is all I have for you today! Before I close, I wanted to mention that there are recent updates on my CRAFTY SALES page, so head over there to check them out. I also wanted to invite you to follow me on social media. I would love to be crafty friends!
Have a great rest of your Thursday!
SUPPLY LIST
For your shopping convenience, all products are linked below. {Includes affiliate linking where possible - this allows small compensation for me at no cost to you. Never fear - I will only ever link to products that I truly love & use!}
For your shopping convenience, all products are linked below. {Includes affiliate linking where possible - this allows small compensation for me at no cost to you. Never fear - I will only ever link to products that I truly love & use!}


Happy Wednesday, crafty friends! I hope that the middle of the week finds you well! Today I am excited to be joining in on the Spellbinders Shadowbox Collection Blog Hop! You can find all the new Shadowbox products HERE.

These dies are such a FUN concept, and can be used in so many ways! My friend Kathleen used them on a layout, framing her photos! I am using mine on a card, but they would make amazing tags, mini albums and home decor projects as well. I will put all the blog hop info at the bottom of my post, but how about we get to my card first?
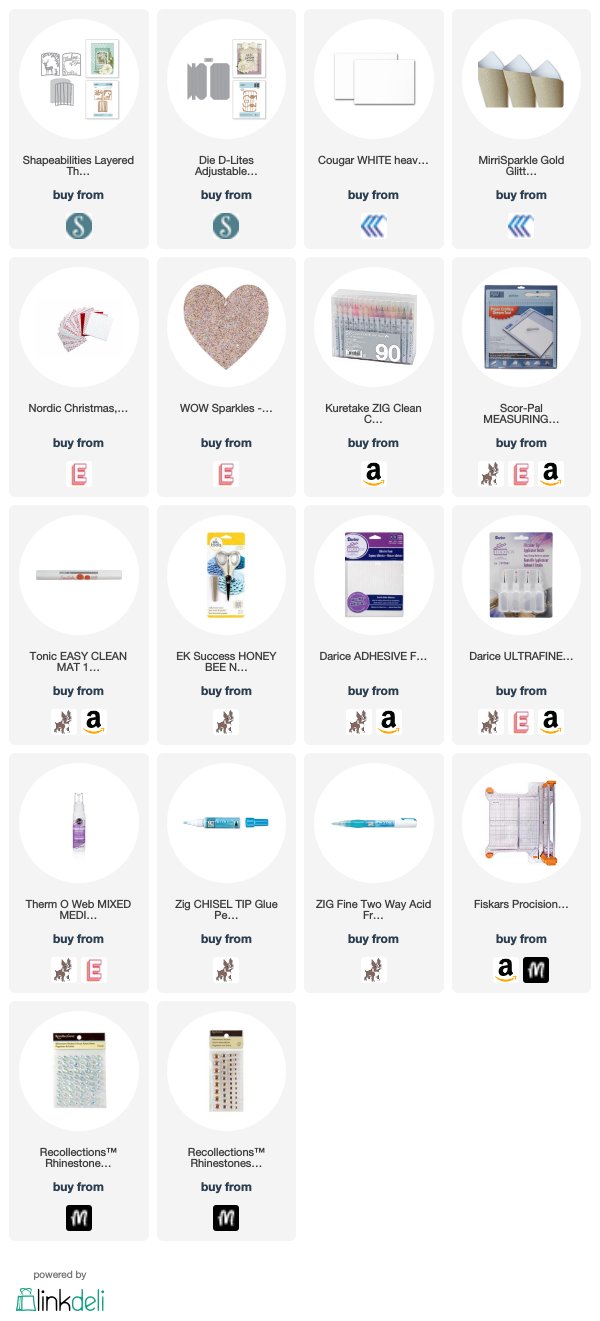
If you know anything about me, you know that I love woodland themed everything - it makes me think of my sweet Layton up in Heaven, and of my home state, Montana. So when I saw the Shapeabilities Layered Thinking of You Woodland Scene, I knew it was what I would use first! The Shadowbox dies come in three sizes, which determine the width of it, and I chose the Die D-Lites Adjustable Shadowbox Frame with 1/2" Border for my card today.


To start, I created the shadowbox from a sheet of 12x12 paper from Alexandra Renke (This is from her Nordic Christmas collection, but is a neutral. It can be used for anything!). You can make them in any size you want, so I chose my typical 4 x 5 1/4 inches, which would be sightly framed by my A2 card base. For the 1/2" shadowbox, your paper strips need to be 2 1/8" wide, and then you need 2 strips cut to the length of each side. So (2) strips that are 4", and (2) strips that are 5 1/4". How do I know that the width needs to be 2 1/8"? Well - because they told me in the initial email - lol! But, if you actually measure the dies - that is exactly their width. As I mentioned above, my friend Kathleen created a layout with these dies and she also did a great video, showing how she put her frames together. You can catch that video HERE - it is really helpful for watching the shadowbox come together.
Once the shadowbox was assembled, I adhered it to the front of a white A2 card base, that I had already layered a block of patterned paper to. The paper is a beautiful river scene from the Creekside papers by 1Canoe2. I LOVE this paper, but was never really sure how to use it on a card. Framing it with the shadowbox was PERFECT! It perfectly compliments the woodland scene that I will be creating next.


Next I diecut the Woodland layers. I started by diecutting them all from 130 LB cougar white cardstock, then cut the top Thinking of You layer again from MirriSparkle gold glittered paper. I covered the tree layer in WOW Sparkles - Your Carriage Awaits. Then I loosely colored the deer/bunny layer with Zig Clean Color Real Markers. Finally, I adhered the two Thinking of You layers together, with the gold on top.
I glued the Thinking of You layer directly to the top of the animal layer, and then popped it up with Darice thin foam tape to the tree layer. Because the tree layer was glittered, I added mixed media adhesive to the foam tape so it would securely attach. With that finished, I layered it to the middle of the card with the same thin foam strips.

Finally, I accented around the woodland diecuts with my signature iridescent jewels. Such a fun card to put together, don't you think? This will NOT fit into an envelope friends - you will have to mail it in a bubble envelope or attach it to a package/gift bag for best results.


So, how about we get to all the blog hop info that you need?
Giveaway:
To celebrate this release, we are giving away a $50 gift certificate to 3 lucky blog readers – selected from the comments across all of the blogs in the hop. Giveaway closes on Sunday, February 10th 11:59 pm EDT. Winners will be announced in our blog hop post the following Monday. Winner is responsible for shipping cost, duties and taxes.
To celebrate this release, we are giving away a $50 gift certificate to 3 lucky blog readers – selected from the comments across all of the blogs in the hop. Giveaway closes on Sunday, February 10th 11:59 pm EDT. Winners will be announced in our blog hop post the following Monday. Winner is responsible for shipping cost, duties and taxes.
Blog Hop Order:
Spellbinders
Becca Feeken
Hussena Calcuttawala
Jung AhSang
Tina Smith
Lea Lawson
Desiree Kuemmerle
Dawn McVey
Olga Direktorenko
Gemma Campbell
Sandra Nagel
Jennifer Snyder
Jean Manis
Yana Smakula
Becca Feeken
Hussena Calcuttawala
Jung AhSang
Tina Smith
Lea Lawson
Desiree Kuemmerle
Dawn McVey
Olga Direktorenko
Gemma Campbell
Sandra Nagel
Jennifer Snyder
Jean Manis
Yana Smakula
That is all I have for you today! Before I close, I wanted to mention that there are recent updates on my CRAFTY SALES page, so head over there to check them out. I also wanted to invite you to follow me on social media. I would love to be crafty friends!
Happy hopping, and have a terrific rest of your Wednesday!
SUPPLY LIST
For your shopping convenience, all products are linked below. {Includes affiliate linking where possible - this allows small compensation for me at no cost to you. Never fear - I will only ever link to products that I truly love & use!}
For your shopping convenience, all products are linked below. {Includes affiliate linking where possible - this allows small compensation for me at no cost to you. Never fear - I will only ever link to products that I truly love & use!}

Happy Tuesday, crafty friends! Let me just say - the past few weeks have been a whirlwind! With back to back trade shows, one of them being in Germany, and just so much to do...it has been crazy around here! Thank you for your patience as its been quiet on my blog - some things just have to give a little when life is so busy! I had a wonderful time at both trade shows, and I will do a recap post for you at a later date - maybe over the weekend.
But today I am excited to be part of the MFT & Friends post for their February 2019 release!

Before I get to my card, I wanted to share some really great deals that MFT offers when you shop with them! They offer free U.S. shipping on all orders $50+.

They also offer a free die with $60+ order, which I have used on my card today! It is that beautiful Birthday Wishes word die - isn't it gorgeous?!

And if you needed another reason to shop MFT, their Shop to Save discounts start at 10% for each order over $100 and go up, up, up to a savings of 25% on orders over $750!
Birthday Bear & Friends is being featured in our February donation campaign — 10% of all retail sales of the Birthday Bear & Friends stamp set and Die-namics through the end of February will be donated to the St. Jude Children’s Research Hospital. For every $25 raised, MFT will donate a No More Chemo party to St. Jude.

I will be using this special stamp set in the VERY near future! I love what it stands for, and what MFT is doing with it. Please consider purchasing this stamp set this month so that they can donate many No More Chemo parties to St. Jude. As a mom who had a baby in the hospital for a very long time...it is so hard. My story didn't end happily, but it really is so amazing when they do. Parties like this are a BLESSING.
How about we get to my card for today? I kept my card simple today, and focused on a couple of the dies. I have two more guest spots this month with MFT Stamps, and I will be using more of the sets that are meant for coloring/scene building. But my shipment came right before I left for all of the trade shows, so I had to keep my card quite simple. :)


To start, I diecut the Birthday Cake die from 110 LB white cardstock. This die comes with two cake detail dies attached to it, so I snipped those off but kept the rest of the cake intact. this made it easier to diecut together, as I wanted colors to peek-a-boo from behind some of the layers.


Next I adhered a block of jewels in a rainbow gradient behind the cake layers. I ended up pushing the purple layers out of sight, as I didn't love the transition as much. I traced the candle flames to a block of cardstock the same size, then placed either an orange or yellow jewel over top of each each traced flame. I adhered both white cardstock layers together with foam tape, then glued them to the front of a black A2 card base.


Next I diecut the Birthday Wishes word (this is the free die w/ $60) three times; once from gold glitter paper, and two times from 110 LB white cardstock. I layered them together with a Zig glue pen, then arranged them to the front of the card. Once they looked how I wanted, I adhered them down with mixed media adhesive.
To finish, I lightly splattered the front with some Licorice liquid watercolor. I didn't add any extra jewels, as there were already so many peeking through the cake layers & candle flames. :)

As I mentioned, I have two more guest posts with MFT Stamps this month - on the 14th and 21st. You will get to see more of this beautiful release in action, with more technique & color driven cards using some of the adorable critter sets released!
That is all I have for you today! Be sure to see what all the other amazing designers have created with this new release on the MFT & Friends February post at the MFT Blog. And be sure to take advantage of all the shopping options I've mentioned above! Shop HERE for the new release!
Before I close, I wanted to mention that there are two really great Pinkfresh Studio promos going on right now. They are updated on my CRAFTY SALES page, so head over there to check them out. I also wanted to invite you to follow me on social media. I would love to be crafty friends!
Have a terrific rest of your Tuesday!
SUPPLY LIST
For your shopping convenience, all products are linked below. {Includes affiliate linking where possible - this allows small compensation for me at no cost to you. Never fear - I will only ever link to products that I truly love & use!}
For your shopping convenience, all products are linked below. {Includes affiliate linking where possible - this allows small compensation for me at no cost to you. Never fear - I will only ever link to products that I truly love & use!}
**Will be up shortly.**
Subscribe to:
Posts (Atom)


Social Icons