

Hi there, blog friends! Welcome to the final day of sharing new stamps & dies from Winnie & Walter! Today we are introducing 2 more stamp sets & 2 more Cutaway sets that will be available to purchase in the Winnie & Walter store tonight!
Scenery: The Party Hangover
The Party
Goldie Trim Cutaway
Lulu Fringe Cutaway
I've created a card that would be really fun to give to a little kid on their birthday, or any time of the year! I got a little messy with some watercolor, and used a rainbow theme again. Check it out!


 Watercolor & rainbows are such a fun combo, don't you think?! They are pretty much perfect together. ;)
Creation Instructions:

Be sure to head on over to today's Winnie & Walter blog post to see what all of the other designers created, and to enter for a chance to win these great products!!
If you want to see sneak peeks of future projects & keep up with me on Facebook, please head on over & like the Lea Lawson Creates page!! And don't forget to become a follower in the right sidebar so you never miss a post. Have an awesome rest of your day!!
Until later,
~L.
Scenery: The Party Hangover
- 4x6 stamp set
- Retails for $15.00
- Includes fifty-five (55) stamps--five (5) big words + forty-nine (49) small words
The Party
- 6x8 stamp set
- Retails for $22.00
- Includes thirty-four (34) stamps--seven (7) sentiments + twenty-seven (27) images
Goldie Trim Cutaway
- Wafer Thin Steel Dies
- Retails for $18.00
- Four (4) dies
Lulu Fringe Cutaway
- Wafer Thin Steel Die
- Retails for $12.00
- One (1) die
I've created a card that would be really fun to give to a little kid on their birthday, or any time of the year! I got a little messy with some watercolor, and used a rainbow theme again. Check it out!
Creation Instructions:
- Make A2 card from red cardstock.
- Cut art paper slightly smaller.
- stamp the doodled lines to the art paper 7 times in embossing ink.
- Cover in white embossing powder, then heat set.
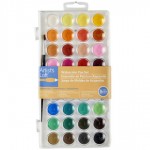
- Brush watercolor over each embossed line in the colors of the rainbow.
- Let dry, then adhere to the card front.
- diecut a tag from vellum.
- stamp the sentiment to the tag in embossing ink.
- Cover in black embossing powder, then heat set.
- Adhere the sentiment tag to the front.
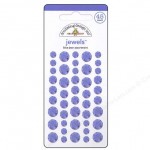
- Embellish with a twine threaded button & jewels to finish.


Be sure to head on over to today's Winnie & Walter blog post to see what all of the other designers created, and to enter for a chance to win these great products!!
If you want to see sneak peeks of future projects & keep up with me on Facebook, please head on over & like the Lea Lawson Creates page!! And don't forget to become a follower in the right sidebar so you never miss a post. Have an awesome rest of your day!!
Until later,
~L.

Hey there, blog friends!! I am back with another day of introducing new products for Winnie & Walter. Today we are introducing 2 more stamp sets & 2 more Cutaway sets that will be available to purchase in the Winnie & Walter store on the evening of January 30th.
Sugar Rush
***About the limited time Free With Purchase Sparkle:
Big Bang Confetti Cutaways
For my first card I combined the new Sugar Rush stamp set with previously released The Big, the Bold and the Extras to create a beautiful wedding card. Check it out!


 I layered & layered & layered a little bit more...and then added some watercolor. This style of card is my bread & butter...just pulling together item after item until it all just fits.
Creation Instructions:

For my next card, I've used the Sparkle stamp set along with some bokeh patterned vellum & a little watercolor splatter. This card ALSO makes my heart go pitter patter a little bit. :)


 Being a photographer, all of the amazing bokeh printed papers just speak to my heart...I purchase them everytime I see them. And then I hoard them. Lol! I've decided I've GOT to use them on some projects, and not just tuck them away in my Scrapbox, petting them occasionally when I take them out. {#kiddingnotkidding}
Creation Instruction:
Be sure to head on over to today's Winnie & Walter blog post to see what all of the other designers created, and to enter for a chance to win these great products!!
If you want to see sneak peeks of future projects & keep up with me on Facebook, please head on over & like the Lea Lawson Creates page!! And don't forget to become a follower in the right sidebar so you never miss a post. Have an awesome rest of your day!!
Until later,
~L.
Sugar Rush
- 4x6 stamp set
- Retails for $15.00
- Includes thirty-one (31) stamps--eleven (11) words + twenty (20) images
- Free With Purchase for a limited time for qualifying orders***
- 3x4 stamp set
- Retails for $8.00 (will not be sold until later in 2015)
- Includes twelve (12) stamps--three (3) sentiments + nine (9) images
***About the limited time Free With Purchase Sparkle:
- Order must be placed from January 30, 2015 at 10:00 p.m. CST through February 13, 2015 11:59 p.m. CST (or while supplies last)
- Your single order must total $35.00 or more before shipping and handling and taxes are applied.
- One Free With Purchase item per person.
- We will be manually adding Sparkle to your order and it will not be reflected on your invoice.
- This offer is while supplies last.
- Sparkle is not a limited edition stamp set and will be released for sale later in 2015.
Big Bang Confetti Cutaways
- Wafer Thin Steel Dies
- Retails for $10.00
- Twelve (12) dies
- Wafer Thin Steel Dies
- Retails for $10.00
- Ten (10) dies
For my first card I combined the new Sugar Rush stamp set with previously released The Big, the Bold and the Extras to create a beautiful wedding card. Check it out!
Creation Instructions:
- Make A2 card from cashmere cardstock.
- Trim a block of mint striped paper & adhere to the front.
- Layer a gold doily to the top of it.
- Cut strips of pink striped paper & gold dotted vellum, then adhere at slight angles to the card front.
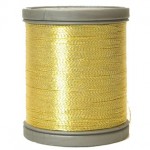
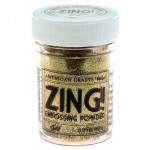
- Trim a block of art paper, then stamp & heat emboss the cake stand using gold glitter embossing powder.
- Stamp & heart emboss the cake to the top of the cake stand using white embossing powder.
- Watercolor the cake, then set aside to dry.
- In the mean time, stamp the banner & sentiment to white cardstock.
- Layer the dry watercolor block to the card front with a knot of gold thread & a strip of mint lace.
- Adhere the banner to the bottom of the watercolor block with foam dots.
- Embellish the card with pearls to finish.


For my next card, I've used the Sparkle stamp set along with some bokeh patterned vellum & a little watercolor splatter. This card ALSO makes my heart go pitter patter a little bit. :)
Creation Instruction:
- Make A2 card from white cardstock.
- Trim two vellum blocks & layer them together.
- Splatter the vellum block with black watercolor & let dry.
- Stamp & heat emboss the sparkling circles to the front using gold glitter embossing powder,
- Stitch two intersecting lines through the embossed sparkling circles, then adhere the vellum blocks to the card front.
- Stamp the sentiment to a white cardstock strip, then trim in an arrow shape.
- Layer the sentiment arrow to the card front with a knot of gold thread.
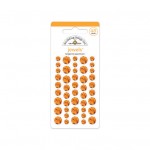
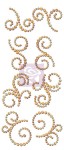
- Embellish with two pearl & jewel flourishes to finish.

Be sure to head on over to today's Winnie & Walter blog post to see what all of the other designers created, and to enter for a chance to win these great products!!
If you want to see sneak peeks of future projects & keep up with me on Facebook, please head on over & like the Lea Lawson Creates page!! And don't forget to become a follower in the right sidebar so you never miss a post. Have an awesome rest of your day!!
Until later,
~L.

Hey there, blog friends! It's a busy week on my blog!! I was asked earlier in the month to do a couple of guest design spots on the My Favorite Things blog, and my first blog post is up tonight!
Valentine's Day is right around the corner, but I think it is important to give love notes to your special someone all throughout the year! So for my card today I created a love card without a Valentine's Day theme to it. I've paired a Webster's Pages 4x6 card with some MFT stamps to create this sweet card!


 One of my favorite things to do is pair stamping with scrapbooking product in order to further the thought behind the sentiment.
Creation Instructions:
For my next card, I went a bit more colorful & cheery! This fun Thank You card would be perfect for sending out after a birthday party. I've combined some Carta Bella papers with some MFT stamps & Dienamics to create this one!


 I just love the fun colors of this, and the MFT Dienamics made it so easy to put together!!
Creation Instructions:
All of the MFT items I used have been linked in the instructions above...so be sure to check them out & pick them up if you so fancy! Thank you so much to my friends at MFT for giving me this opportunity to guest design! I appreciate it so much, and look forward to my next guest design post in February!
Thanks for checking out my post today!! If you want to see sneak peeks of future projects & keep up with me on Facebook, please head on over & like the Lea Lawson Creates page!! And don't forget to become a follower in the right sidebar so you never miss a post. Have an awesome rest of your day!!
Until later,
~L.
Valentine's Day is right around the corner, but I think it is important to give love notes to your special someone all throughout the year! So for my card today I created a love card without a Valentine's Day theme to it. I've paired a Webster's Pages 4x6 card with some MFT stamps to create this sweet card!
Creation Instructions:
- Make A2 card from MFT smooth white cardstock.
- Trim a 4x6 card & vellum block slightly smaller, and layer together.
- Stamp the hearts in embossing ink to the paper block using the "All My Love" stamp set.
- Cover them in gold glitter embossing powder, then heat set.
- Stitch two intersecting lines to the front using gold thread.
- Stamp the sentiment to a white cardstock strip using the "Smitten With You" stamp set.
- Cut the edges to make the sentiment strip look like an arrow.
- Layer the sentiment arrow with a knot of gold thread to the card front.
- Embellish it with a gold enamel bow to finish.
For my next card, I went a bit more colorful & cheery! This fun Thank You card would be perfect for sending out after a birthday party. I've combined some Carta Bella papers with some MFT stamps & Dienamics to create this one!
Creation Instructions:
- Make A2 card from aqua cardstock.
- Diecut the angled paper block & peekaboo circle from polka dot paper using the MFT "Blueprints 18" Dienamics set.
- Diecut the circle border from the aqua cardbase using Blueprints 18.
- Adhere the polka dot paper block to the bottom of the card using foam dots.
- Diecut a circle from yellow star paper and a star from red striped paper using Blueprints 18 and adhere them inside the peekaboo circle.
- Diecut the banner from oatmeal cardstock using Blueprints 18.
- Stamp the sentiment to the banner using the "Photo Booth" stamp set.
- Adhere the sentiment banner to the lower right corner.
- Embellish with twine threaded buttons to finish.
All of the MFT items I used have been linked in the instructions above...so be sure to check them out & pick them up if you so fancy! Thank you so much to my friends at MFT for giving me this opportunity to guest design! I appreciate it so much, and look forward to my next guest design post in February!
Thanks for checking out my post today!! If you want to see sneak peeks of future projects & keep up with me on Facebook, please head on over & like the Lea Lawson Creates page!! And don't forget to become a follower in the right sidebar so you never miss a post. Have an awesome rest of your day!!
Until later,
~L.
Subscribe to:
Posts (Atom)


Social Icons