

So, did you think I was getting possessive of the sun or something? Tee hee- I couldn't think of a better post title, so I decided to use part of the sentiment on my CPS card this week. Although, it is my sunshine....as well as your sunshine, and her sunshine, and his sunshine....I digress. Sorry it has been so long between posts! Blogger and I haven't been getting along so well. I was about ready to permanently break up....but I think it is finally letting me add images into my posts. Let's see how it goes....:)
I have a few cards to share with you today. But first, I have some news in case you hadn't heard yet. I was asked to be on the card design team for GCD Studios! I love their papers, and the latest embellishments they have been coming out with! I can't wait to start!
Now onto some cards! First up is my card for CPS sketch 157 this week. We were sponsored by JustRite Stampers this week, and I picked out the "Romantic Sentiments Centers". But, I think I used them in a rather unique way! Check it out!


I have a few cards to share with you today. But first, I have some news in case you hadn't heard yet. I was asked to be on the card design team for GCD Studios! I love their papers, and the latest embellishments they have been coming out with! I can't wait to start!
Now onto some cards! First up is my card for CPS sketch 157 this week. We were sponsored by JustRite Stampers this week, and I picked out the "Romantic Sentiments Centers". But, I think I used them in a rather unique way! Check it out!

"Sunshine Everyday" supplies:
Cardstock: Bazzill Basics
Paper: Imaginisce, October Afternoon & Sassafras
Stamps: JustRite Stampers
Ink: Clearsnap (Pigment: mango tango)
Jewels: Doodlebug Designs & Michael's
Glitter: Making Memories & Ranger Stickles
Diecut Machine: Cricut Expression by Provo Craft
Diecut Cartridges: Hello Kitty Greetings, Pooh & Friends by Provo Craft
Instructions: Fold white cardstock in half to make cardbase. Round the corners of a blue paper block and adhere to the front. Freehand cut the hills from green patterned paper, and round the appropriate corner. Adhere to the bottom of the blue block. Cut the sun from yellow & orange cardstock at 2.5" and 3" using the Cricut Expression and Hello Kitty Greetings cartridge. Cut a circle of white cardstock and stamp the sentiment to it. Layer all of the items together. Cut the clouds from white cardstock at 2" & 3", and cover in glitter. Adhere the three cuts to the front of the card, popping the sun and top cloud. Accent the sun with jewels. Cut the butterfly and its layers from yellow & pink cardstock at 3/4" using the Pooh & Friends cartridge. Layer together and accent with jewels. Adhere to the top cloud cut, and cover the pink layer in Stickles.
Up next is a card I did for FTL #81 at the Clean & Simple Stamping blog. Such a fun little sketch this week...I just added a ribbon to it!

"Thank You" supplies:
Cardstock: Bazzill Basics
Stamps: Papertrey Ink (Dot Spot & Asian Fusion)
Ink: Clearsnap (Pigment: black, seaglass, robin's egg, sky blue, cyan)
Ribbon: Renaissance By Design
Jewels: Doodlebug Designs
Corner Rounder: EK Success
Instructions: Fold kraft colored cardstock in half to make card base, and round the bottom corners. Round the bottom corners of a block of white cardstock, and stamp the dots and sentiment to the bottom of it. Tie ribbon above the stamped images, and adhere the entire white block to the front of the card. Accent the dots with clear jewels.
And this last one is based on the current Embellish Magazine color/border challenge. I am not quite sure how I feel about this card...but it is done. So, I am posting it! Tee hee!

"Easter Blessings" supplies:
Cardstock: Bazzill Basics
Paper: Imaginisce
Paper Frill/Button: Doodlebug Designs
Ribbon: Renaissance By Design
Twine: Darice Inc.
Twine: Darice Inc.
Stamps: Papertrey Ink (Tags For Spring)
Ink: Clearsnap (Pigment: citrine, orchid, black & Chalk: yellow cadmium, peach pastel)
Jewels: Westrim Crafts
Puffballs: Darice Inc.
Corner Rounder: EK Success
Instructions: Fold pink cardstock in half to make card base. Cover the bottom with an Easter paper block. Round the top corners of a strip of white cardstock. Stamp the bunnies to the middle and give them white puffball tails. Adhere the strip to the top of the card. Add pink paper frill a little below the seam, and then tie ribbon around the seam. Adhere a button to the bow using twine. Stamp the sentiment in black directly to the patterned paper. Accent underneath with jewels, and add a thin strip of paper to each side of the "Easter" part of the sentiment.
Since Blogger is finally letting me post images, I am just going to keep this short and sweet! I will be back in a couple days to share some more!! Hopefully it will be a bit more personal of a post then! Have a great night! ♥
Until later,
~Lea

I was asked to join the color challenge team at Stacey's Stamping Stage blog, and I thought it would be a lot of fun, so of course I said yes! This week is my first week as a team member, so I am here to share the challenge with you....I hope you will take it on. First up, here is the color challenge:
And here is my take using these fabulous colors!


"Just Because" supplies:
Cardstock: Bazzill Basics
Paper: Shabby Green Door
Stamps: Papertrey Ink (Year of the Flowers: Violets & Asian Fusion)
Ink: Clearsnap (Pigment: moss green, cranberry, colonial blue)
Ribbon: Renaissance by Design
Twine: Darice Inc.
Button: Doodlebug Designs
Pearls: Kaiser Craft
Corner Rounder: EK Success
Instructions: Fold dotted paper in half to make cardbase and round the bottom corners. Round the bottom corners of a block of white cardstock, and adhere to the front. Punch a border to striped paper and adhere to the middle. Add a floral block to the top using dimensional adhesive. Stamp the flower, leaves and sentiment to the bottom half of the white block, and accent with pearls.
Be sure to check out the rest of the crew's cards as well....it is sure to be a treat! ♥♥♥

 at Lea's Cupcakes & Sunshine
Until later,
~Lea

Hi everyone! Hope your day is going wonderfully so far!! It is a GORGEOUS day in Missoula! Sunny, mild...I would daresay almost warm....but I think the air is also full of allergens. Because I have been sneezing non-stop! Oh well...I will deal with that if it means nice weather. Josh and I planted two strawberry plants yesterday. They are sitting in the windowsill with the most sunshine in our house, and I can't wait to watch them grow and grow. We are thinking of planting a small garden this year with things we eat often...like sweet onions, strawberries, tomatoes, and maybe some grapes. I think it sounds like something fun we can do together, and we will get some rewards from it (if we do it right...tee hee!). What do you think...let me know if there are any other fruits or veggies that you think we just have to try and grow!
I have a few cards to share with you today! I did all of them with the Olympics of Stamping at the Moxie Fab blog in my mind. First up is my card for Sketch 156 at CPS this week, and fits the "Hello/Thinking of You" theme for the OOS.
Instructions: Fold white cardstock in half to make card base, and round the bottom corners. Emboss the front using a Cuttlebug and Argyle embossing folder. Tie pink ribbon around the bottom. Stamp the label, shoe and sentiment to white cardstock and cut out. Adhere over top of the ribbon using dimensional adhesive. Accent with colored pearls.
For these next few cards, I played with the PTI spring color challenge that Nichole came up with. This first one uses Dawn's color combo of aqua mist, hibiscus burst, spring moss and fresh snow. It also fits the "Thank You" section of OOS.


I have a few cards to share with you today! I did all of them with the Olympics of Stamping at the Moxie Fab blog in my mind. First up is my card for Sketch 156 at CPS this week, and fits the "Hello/Thinking of You" theme for the OOS.

"From My Sole To Yours" supplies:
Cardstock: Bazzill Basics
Stamps: Gina K Designs (Lovely Labels) & Renaissance By Designs (Sole to Soul)
Ink: Clearsnap (Pigment: turquoise, razzberry)
Ribbon: Michael's brand
Pearls: Kaiser Craft
Corner Rounder: EK Success
Embossing Machine: Cuttlebug by Provo Craft
Embossing Folder: Argyle by Provo Craft
Instructions: Fold white cardstock in half to make card base, and round the bottom corners. Emboss the front using a Cuttlebug and Argyle embossing folder. Tie pink ribbon around the bottom. Stamp the label, shoe and sentiment to white cardstock and cut out. Adhere over top of the ribbon using dimensional adhesive. Accent with colored pearls.
For these next few cards, I played with the PTI spring color challenge that Nichole came up with. This first one uses Dawn's color combo of aqua mist, hibiscus burst, spring moss and fresh snow. It also fits the "Thank You" section of OOS.

"Thanks For Everything" supplies:
Cardstock: Bazzill Basics
Stamps: Papertrey Ink (Dot Spot & Year of the Flowers: Violets)
Ink: Clearsnap (citrine, robin's egg, razzberry)
Jewels: Doodlebug Designs
Corner Rounder: EK Success
Instructions: Fold white cardstock in half to make card base, and round the bottom corners. Stamp the three dots to the front of the card, and accent with matching colored jewels. Stamp the sentiment to the right of the dots.
This next one uses Kelly Purkey's color picks of raspberry fizz, summer sunrise, melon berry, and sweet blush. It is goes with the "Hello/Thinking of You" section of OOC.

"Wishing You Well" supplies:
Cardstock: Bazzill Basics
Stamps: Papertrey Ink (Dot Spot & Asian Fusion)
Ink: Clearsnap (Pigment: magenta, mango tango & Chalk: rouge, rose coral)
Jewels: Doodlebug Designs
Corner Rounder: EK Success
Instructions: Fold orange cardstock in half to make card base, and round the bottom corners. Round the bottom corners of a block of white cardstock. Stamp the three dots to the middle of the cardstock, and accent with orange jewels. Stamp the sentiment below them, and adhere the block to the front of the card.
And last but not least, this one uses Lisa Johnson's color choice of sweet blush, vintage cream, kraft, and dark chocolate. And yes...I am a bit smitten with the Dot Spots set from PTI. I ♥♥♥ this set lots!! It fits the "Happy Birthday" section of OOC.

"Birthday Wishes" supplies:
Cardstock: Bazzill Basics
Cardstock: Bazzill Basics
Paper: Basic Grey & October Afternoon
Stamps: Papertrey Ink (Dot Spots & Asian Fusion)
Ink: Clearsnap (Pigment: dusty plum, chestnut)
Ribbon: Renaissance By Design
Pearls: Kaiser Craft
Corner Rounder: EK Success
Border Punch: Fiskars
Instructions: Fold chocolate brown cardstock in half to make card base, and round the bottom corners. Round the bottom corners of a block of kraft cardstock. Ink the edges of a strip of dotted paper and adhere to the right side of the kraft block. Stamp the dots and sentiment to to the left side, and adhere the entire block to the front. Punch a border to a strip of paper and tie ribbon around the left side. Adhere to the dotted strip using dimensional adhesive. Accent the stamped dots with pearls.
Do you want to hear something crazy? I used to say I was just NOT a stamper. I struggled with stamping SO much. When we started getting sponsors at the CPS blog, and most of them were stamping companies...I didn't know if I was going to be able to do it. But, I have found the type of stamps, images, and ink that work best for me...and now I actually love it! There are so many more sentiment possibilities out there when you use stamps, and all the fabulous colors of ink. I just had to find my system, and now I consider myself a stamper. Craziness, I tell you.
Do you want to hear a random stamping tip of mine? Well, if you have a Cricut of any kind...then make sure you save these when they are no longer sticky enough to use for cutting:

Wipe them down with a damp cloth or baby wipe, let it dry, and then put the plastic cover back on it. And then when you are stamping...use this to hold down the paper blocks you are stamping on. It has all the measurement grids you need for marking pencil lines where you want to stamp...and it makes a safe place for letting your stamped images dry. I use pigment ink A LOT, and we all know that it smears. I just put this whole piece to the side to let my inky images dry so they don't get ruined. This is my stamping secret that I am now sharing with all of you! It is how I get images/sentiments to stamp straight, and how I don't smear them all over.
I watched the first disk over a couple of days last week:

Oh my goodness...it is hilarious!! I love this show! I very rarely watch many shows on television, and we don't have DVR or Tivo (I know...we are probably one of very few. It just $16 per month that doesn't seem necessary.) So, I just wait until they are available on Netflix...and this is at the top of my queue now. Disk 2 is coming tomorrow! I cringe during the scenes with his wife....she portrays the type of woman that I just don't care for in the least. But, I adore the rest of the show. I am excited to see what happens next!
Any thoughts on American Idol this week? I think the right people went home...I totally agree with you America. Although the majority of them did SO much better this week...those 4 were still pretty bad. And I was SO excited to see Danny Gokey sing last night! That isn't my favorite song of his, but I do love the lyrics, and he seems so excited about it. I am happy that things are turning out for him...I adore him and his outlook on life!
Any thoughts on American Idol this week? I think the right people went home...I totally agree with you America. Although the majority of them did SO much better this week...those 4 were still pretty bad. And I was SO excited to see Danny Gokey sing last night! That isn't my favorite song of his, but I do love the lyrics, and he seems so excited about it. I am happy that things are turning out for him...I adore him and his outlook on life!
Well, I am going to get going for now. We want to get out and about for a little bit today. I am thinking a stop at DQ is in order so I can get a yummy grape Arctic Rush freeze. Yum...love those things! Have a great one! ♥♥♥
Until later,
~Lea

Happy Wednesday, my friends!! Hope your week has been a good one so far!! I have a few cards to share with you today, and I've gone all Irish on you! Tee hee! Actually...I don't have an ounce of Irish in me, but I love to make St. Patty's day cards. There is something about rainbow colors, shamrocks, bright green, glitter....they just make me happy! I am sure I will be getting some more done this month!
My first card uses Kazan's Sketch 47 from 2 Sketches 4 U. Such a fabulous sketch this week...as always.




My first card uses Kazan's Sketch 47 from 2 Sketches 4 U. Such a fabulous sketch this week...as always.

"Happy St Patrick's Day" supplies:
Cardstock: Bazzill Basics
Paper: Basic Grey
Jewels/Glitter: Doodlebug Designs
Ribbon: JoAnn's Fabric
Stickers: Making Memories
Corner Rounder: EK Success
Diecut Machine: Cricut Expression by Provo Craft
Diecut Cartridge: Designer's Calendar by Provo Craft
Instructions: Fold white cardstock in half to make card base, and round the bottom corners. Round the bottom corners of a block of green doily paper and adhere to the front. Round the bottom corners of a white cardstock block, and tie yellow ribbon around the middle of it. Adhere the block to the front of the card. Cut the shamrock circle from green cardstock at 2.5" using the Cricut Expression and Designer's Calendar cartridge. Cover in glitter, adhere over top of the ribbon, and accent the middle with 3 green jewels. Add a rainbow of jewels to the top part of the circle. Cut the sentiment from black cardstock at 2" and adhere to the lower right corner. Finish the sentiment using tiny black alphas. Punch a border to yellow dotted paper, and adhere to the top with dimensional adhesive.
This card full of the cutest cuts, is based on Sketch 58 at The Sweetest Thing. Such a fun one this week...love it!!

"Happy St Patricks Day" supplies:
Cardstock: Bazzill Basics
Paper: Basic Grey & Cornish Heritage Farms
Ribbon: Renaissance By Design
Twine: Darice Inc.
Twine: Darice Inc.
Button/Jewels: Doodlebug Designs
Rub-ons: Creative Imaginations
Rub-ons: Creative Imaginations
Corner Rounder: EK Success
Diecut Machine: Cricut Expression by Provo Craft
Diecut Cartridge: Tie The Knot, Paper Dolls Dress Up & Hello Kitty Greetings by Provo Craft
Instructions: Fold green cardstock in half to make card base, and round the bottom corners. Cover the bottom in white cardstock and round the corners. Round the top corners of a block of white cardstock, and adhere to the top. Tie a strip of green ribbon around the seam, and attach a button to the bow using twine. Round the top corners of 3 patterned paper blocks, and adhere to the front. Add the sentiment to the lower right corner using rub-on letters, and accent with a rainbow strip of jewels. Cut the lips from red & pink cardstock at 1.5" using the Cricut Expression and Tie The Knot cartridge. Layer together and adhere to the first block. Cut the shamrock from green cardstock at 1.75" using the Paper Dolls Dress Up cartridge. Layer on the second paper block and accent with a green jewel. Cut the rainbow from white, red, yellow, green & purple cardstocks at 1.5" using the Hello Kitty Greetings cartridge. Layer on the third paper block.
And this last one is based on the latest sketch at 365 cards! I love the fun lines in the upper left corner on this one...and it let me break out some of my favorite stamps!!

"Kiss Me, I'm Irish" supplies:
Cardstock: Bazzill Basics
Paper: My Mind's Eye
Stamps: Gina K Designs (Happy Hearts set) & Kitchen Sink (Plaid Plus)
Ink: Clearsnap (Pigment: green, lime, cranberry)
Stickers: Making Memories
Rub-ons: Creative Imaginations
Jewel: Westrim Crafts
Corner Rounder: EK Success
Instructions: Fold red paper in half to make card base, and round the bottom corners. Round the bottom corners of a white paper block. Stamp the hearts lines to the upper left corner. Stamp the larger hearts to white cardstock and cut out. Adhere them to the front in the shape of a shamrock, and add a stem from green cardstock. Add the rub-on frame and letters to the lower right corner, and finish the sentiment using red glitter stickers. Adhere the entire block to the front of the card, and accent the middle of the shamrock with a heart shaped jewel.
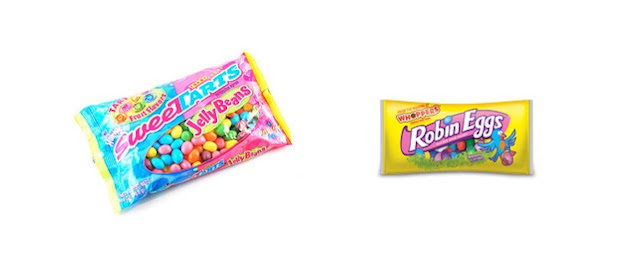
And these are my major weakness right now...YUM!!

And lastly...we watched these recently and thought they were pretty good movies!! They were both funny, and a little heartwarming. I have adored Alexis Bledel since the show Gilmore Girls...so of course, I love this movie! And "500 Days of Summer" was just quirky and fun...a little sad in parts, but still funny at the same time! I would recommend seeing them if you have the time!


Well, I will leave you on that note! Have a great rest of your evening! ♥
Until later,
~Lea
Subscribe to:
Posts (Atom)


Social Icons