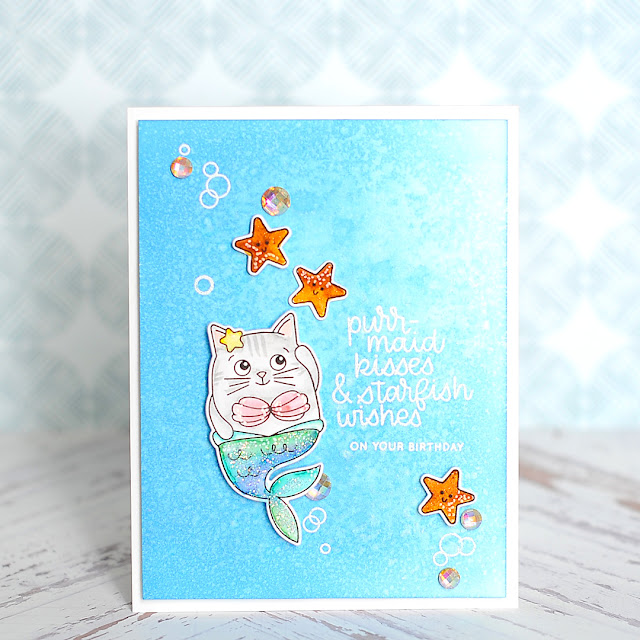
Happy Sunday, blog friends! Just dropping in today with another card using some of the products from the Good Vibes new release from Simon Says Stamp!
Here's the thing - I'm not the best at coloring. My skills are basic at best, so critter stamps always make me a bit nervous. BUT...this one is SO cute. And I'm not even a CAT person. But seriously...how adorable is that mer-kitty?!! I knew I had to look my coloring skills straight in the face, and just do my best. And you know what...I can tell that I am improving! Even just a month ago, this kitty would have looked very different. I just love when you see progress in something that you are trying to get better at!
This card came about because I had that blue watery background just laying on my desk, unused. I had created it for a different card, but this background hadn't turned out quite the way I had wanted it. But, it was still pretty...so I hung on to it. I'm so glad I did, because it had the perfect water feel that I wanted for the background of this card! The stamp & die set that I am using today from the Good Vibes release is called Summer Cuddly Critters, and I think you are going to have SO much fun creating with it!
Happy Friday, blog friends! It's always a happy day when we are celebrating a brand new release from Simon Says stamp, right?! Their latest collection called Good Vibes went live this week...and it is such a FUN collection of products! Simon is doing a free gift of Pebbles puffy stickers with purchase promotion for the release - just use the code PUFFY upon checkout to take advantage! The code will expire on Sunday, 6/24 at 11:59pm.
This is day 2 of the Good Vibes Release Blog Hop, and we've got quite the lineup for you! I will put all of the blog hop details at the end of my post, but how about we get to my cards first? It is finally officially summer, and these new products just scream summer, vacation & fun! What I love about them is they also capture my heart with missing you sentiments, as I am always missing my family all the way over in Montana. That is what I focused on with my cards today!
Hi there, blog friends! Today is Father's Day in the United States, and I've got this lovely mountain themed Dad card to share with you today. If it looks a little familiar, that is because I based it on the same moodboard that we used for Layton's Legacy Blog Hop!
Father's day brings a lot of mixed emotions for me, as it does for a lot of people. It brings about the emotions that are tied to my biological father. But it also serves as a reminder that I have been blessed with an amazing step-dad, who has raised me since the age of 5. When we lived in Arizona, he had friends that called him Mountain because of his height...so this card was definitely also inspired by that! And then, of course, I think about Joshua. And how such an amazing person doesn't get to be a dad to his children this side of Heaven. How we are missing 4 tiny little hands & feet, and two sticky faces on days like this. It's a lot for me - so we don't make a huge deal about days like this. But, we still try to celebrate in small ways. And I hope that however you might feel about holidays like this, whether you love them or hate them...that you are still having an awesome day doing what you love!
Hi there, blog friends! Welcome to day 5 of the SugarPea Designs Summer Sweet Peek Week! We've got a ton of amazing new products to share with you, plus lots of inspiring projects!
All of the new stamps & dies will be available for purchase in the SugarPea Designs shop tonight! Be sure to get all the details you need on the SugarPea Designs blog.
Today I am featuring the Geo Floral CoverPlate that was featured the other day, and the Warm Welcome stamp set. I'm also featuring the Summer Sweet Incentive item (free with $60 purchase), which is the Welcome word die.
Hi there, blog friends! Welcome to day 4 of the SugarPea Designs Summer Sweet Peek Week! We've got a ton of amazing new products to share with you, plus lots of inspiring projects!
All of the new stamps & dies will be available for purchase in the SugarPea Designs shop on Friday evening! Be sure to get all the details you need on the SugarPea Designs blog.
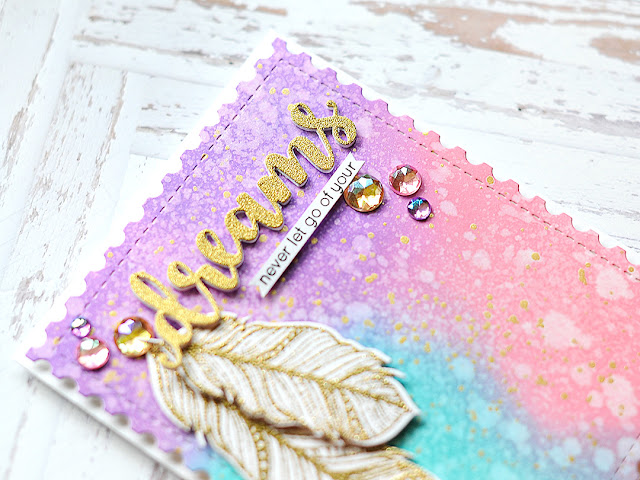
Today I am featuring the following items: BoHo Feathers stamps & dies, Dare to Dream stamp set & Dream word die. I love the dreamy colors, and they felt fitting for the theme of these new stamps & dies.
To start I cut an A2 card from white cardstock, then set aside. Next I cut a block of cardstock the same size & blended Distress Oxide inks to it in the following colors: Wilted Violet, Worn Lipstick & Peacock Feather. Then I spritzed it with water & picked it back up with a paper towel. Finally, I sprayed it down with white shimmer spray and flicked gold paint splatters to the front of it. Then I set it aside to dry.
Next I stamped & heat embossed the feathers in gold glitter powder, and cut them out with the coordinating dies. Then I diecut the word DREAMS four times: once from gold glitter paper and three times from white cardstock. I layered them together using a Zig glue pen, then set aside. Finally, I stamped the rest of the sentiment in onyx black Versafine to white cardstock, and trimmed it into a thin strip.
Then it was time to put the card together! I mounted the ink blended background to the card front with foam adhesive. Then I adhered the feathers to the left side of the card using both mixed media glue & foam tape. Then I added the word DREAM across the top, adhering it down with mixed media ink.
Then I added the rest of the sentiment directly below the word diecut, and accented the card with my signature jewels tucked here & there.
I wish you could see the shimmer better on this card...it is SO pretty in real life! It just doesn't photograph very well.
That is my cute little dream card today! I hope that you liked it! Now let's get to the rest of the information you need. First up, here is the link list for the blog hop:
Guest Designers
You can get additional information at the SugarPea Designs blog (linked above).
Wendy is giving away the stamp set to one lucky
winner. All you have to do is leave a comment on the SPD Blog - but you
will get extra entries if you also hop along and comment on all the
other designers' blogs as well!
I will be back tomorrow with another card featuring brand new products from SugarPea Designs!
SUPPLY LIST
For your shopping convenience, all products are linked below. {Includes affiliate linking where possible - this allows small compensation for me at no cost to you. Never fear - I will only ever link to products that I truly love & use!}

Hi there, blog friends! Welcome to day 2 of the SugarPea Designs Summer Sweet Peek Week! We've got a ton of amazing new products to share with you, plus lots of inspiring projects!
All of the new stamps & dies will be available for purchase in the SugarPea Designs shop on Friday evening! Be sure to get all the details you need on the SugarPea Designs blog.
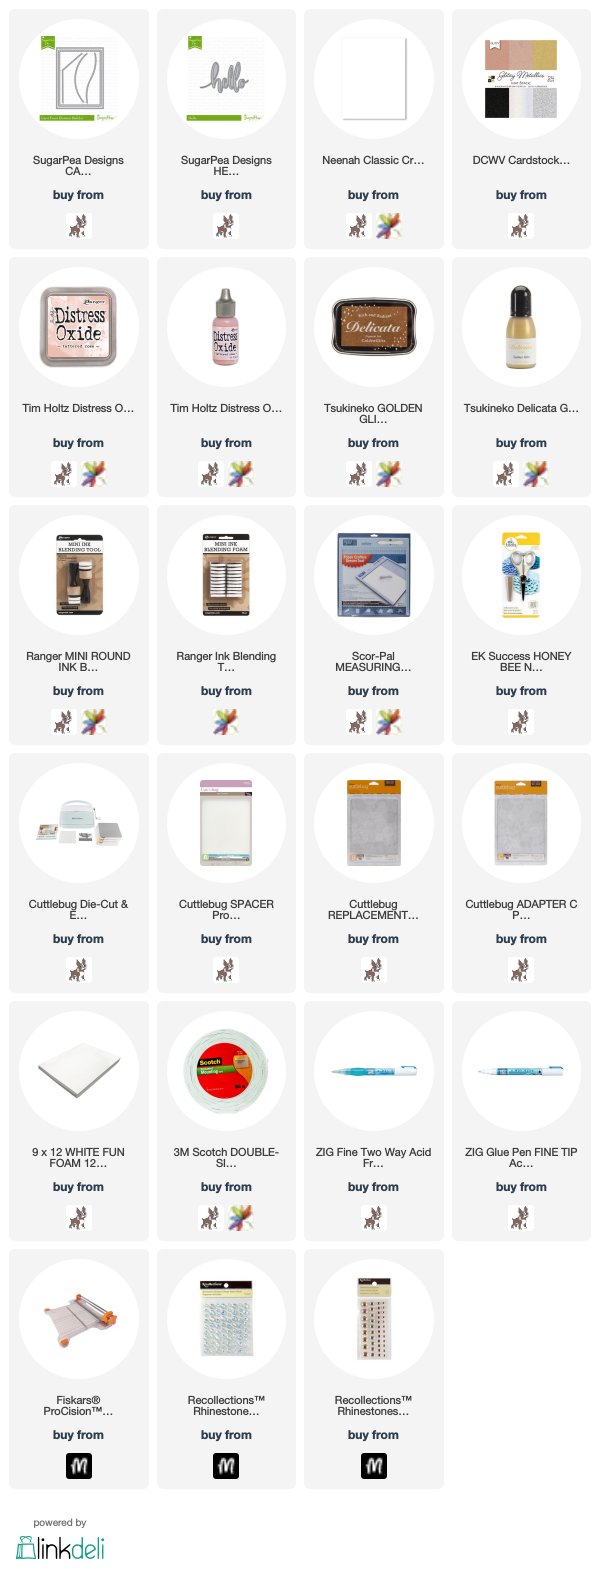
Today we are featuring the Message Letter Board dies, and the Hedge Hugs stamps & dies. I focused on the message board, but you should definitely check out Hedge Hugs too! It is super adorable, and I will be using it in the very near future! I kept my card pretty clean & simple, and let the dies speak for themselves!
To start I cut an A2 card from white cardstock, then set aside. Then I diecut the stitched block & message board block from white cardstock as well. I ink blended the message board with Distress Oxide ink in Tattered Rose, and Delicata ink in Golden Glitz.
I adhered the ink blended background to the center of the card base, and then mounted the frame over top of it with foam tape. I used two layers of the foam tape, ans I wanted it to have pronounced dimension from the message board cut.
Next I diecut the small letters multiple times from white foam, and the word hello four times; once from gold glitter paper, and three times from white cardstock. I layered them together with a Zig glue pen, then adhered it to the bottom of the card. Then I proceeded to arrange the foam letters to the top to finish the sentiment.
Finally, I accented my card here & there with my signature jewels. These are iridescent jewels in shades of clear, pink & gold.
That is my cute little message board card today! I hope that you liked it! Now let's get to the rest of the information you need. First up, here is the link list for the blog hop:
Guest Designers
You can get additional information at the SugarPea Designs blog (linked above).
Wendy is giving away the stamp set to one lucky
winner. All you have to do is leave a comment on the SPD Blog - but you
will get extra entries if you also hop along and comment on all the
other designers' blogs as well!
I will be back tomorrow with another card featuring brand new products from SugarPea Designs!
SUPPLY LIST
For your shopping convenience, all products are linked below. {Includes affiliate linking where possible - this allows small compensation for me at no cost to you. Never fear - I will only ever link to products that I truly love & use!}
Hi there, blog friends! Welcome to day 2 of the SugarPea Designs Summer Sweet Peek Week! We've got a ton of amazing new products to share with you, plus lots of inspiring projects!
All of the new stamps & dies will be available for purchase in the SugarPea Designs shop on Friday evening! Be sure to get all the details you need on the SugarPea Designs blog.
Today we are featuring the new Stuck on You stamp set, and coordinating SugarCut dies, along with the Geo Floral CoverPlate. I didn't use the CoverPlate on my card today, but you can be certain it will grace one of my cards in the very near future! Instead I focused on Stuck On You, and created these abstract cacti using my watercolor pens, MISTI & spray bottle!
Hi there, blog friends! Welcome to day 1 of the SugarPea Designs Summer Sweet Peek Week! We've got a ton of amazing new products to share with you, plus lots of inspiring projects!
All of the new stamps & dies will be available for purchase in the SugarPea Designs shop on Friday evening! Be sure to get all the details you need on the SugarPea Designs blog.
Today we are featuring the new Llama Just Say stamp set, and coordinating SugarCut dies. This set is SO adorable, and you are going to just love all the fun & punny sentiments. I made a little sunset scene for my card today, and it turned out so cute! I just love all the pops of color!
Hi blog friends! Today I've got some super cutie cards to share with you today using some new Flora & Fauna clear stamps. Have you seen their latest stamp release? It is super full of whimsy, and you will just LOVE every piece in it! My cards for today are unicorn themed, and I just think they are the cutest! I had so much FUN creating & stamping them!
For both cards I created black A2 card bases, then set aside. For this first card, I stamped the adorable unicorn face & sentiment from the Unicorn Car stamp set to the front of the card in onyx black Versafine ink. I hit it with my heat gun to make sure it was set, then proceeded to color the unicorn with my Zig Clean Color Real Markers. Then I painted the horn gold with my Gansai Tambi starry colors watercolor.
I let that set & dry, and then colored around the stamped image with the light blue Zig pen. I blended it out with water to create this soft, magical background. I added some shimmer to the stamped image with a Wink of Stella clear pen.
I mounted the stamped panel to a block of foam adhesive, and adhered it to one of the card bases. I covered the card edges, then splattered the front with both black & gold paint splatters.
The final step was to accent the front with my signature jewels here & there! It's really hard to photograph shimmer, but I tried to angle this one towards the sunlight a little bit in hopes you would be able to see it!
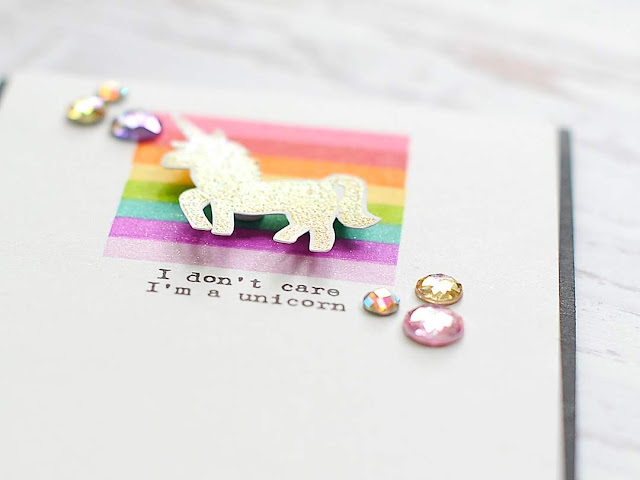
For my second card, I stamped the rainbow gradient using the long, skinny bar from the Strawberry Fields stamp set. I looked to my Catherine Pooler inks for this card, and used the following gradient of colors: Party Dress, Rockin Red, Orange Twist, Tiara, Lime Rickey, Aquatini, Flirty Fushia, & Sweet Sixteen. {They are all linked below!}
I stamped the sentiment from the Unicorn Car stamp set in onyx black Versafine ink directly below stamped gradient. I used my MISTI tool to make sure it was lined up, but you could easily do this with a clear block as well. I am now just a bit dependent on my stamping platform. ;) Then I mounted the entire block to foam adhesive, and adhered it to the other black card base. I painted over each color with my Wink of Stella clear pen.
Next I stamped & heat embossed the unicorn to white cardstock in gold embossing powder. I actually used a powder called Enchanted Gold by Ranger, but I couldn't find it in any stores. So, I linked a different one below that I felt looked closest to what I actually used. Then I fussy cut the unicorn, and mounted it to the top of the rainbow gradient with foam dots.
Finally, I accented it with my signature jewels here & there! I was able to get the sparkle from the Wink of Stella pen a little better in this image...I just love how subtle, yet how shimmery it is at the same time!
Those are my cutie unicorn cards! Aren't those stamp sets from Flora & Fauna the cutest?! They are SO fun, and whimsical. Be sure to check them out, and see how super adorable everything is that F&F creates!
Before you get along with your day, I wanted to invite you to follow me on social media. I hang out on Instagram a lot, and share my work in progress in my stories...along with REALLY cute photos of my dogs! :) Plus, I just started a YouTube channel, and while there are only a few videos right now...I will be adding new content consistently!
Have a wonderful day, friends and happy hopping!
SUPPLY LIST
For your shopping convenience, all products are linked below. {Includes affiliate linking where possible - this allows small compensation for me at no cost to you. Never fear - I will only ever link to products that I truly love & use!}

Subscribe to:
Comments (Atom)









Social Icons