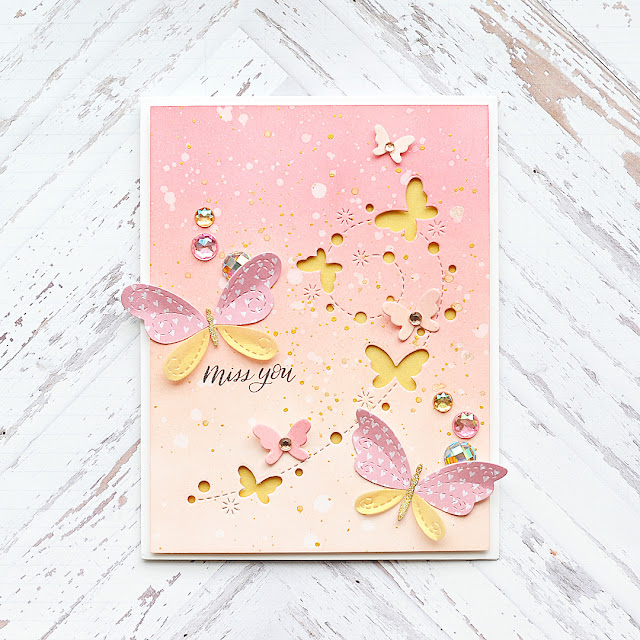
Happy Thursday, blog friends! I hope you've had a wonderful week so far! Today I want to share a card with you using some of the new products from the Simon Says Stamp Fluttering By Release! Today my card is focused on a lot of the adorable butterfly items that were included in the release!
I used the Butterfly Shimmer die, the Stitching Butterflies dies, and the sentiment came from the Mom Flowers stamp set. I live over 1,000 miles away from all my family, and these products just felt perfect for a card letting them know how much I miss them! Here is what I created!
To start I created an A2 card from white cardstock. Then I cut a block of the same cardstock slightly smaller, and blended Distress Oxide inks in a gradient fashion to the front using Worn Lipstick & Tattered Rose. The I spritzed it with water, and picked it up with a paper towel to reveal the reaction with the oxide inks. Then I spritzed it with shimmer spray, and flicked gold splatters to it.
Next I cut the front with the Butterfly Shimmer die, and set aside the little butterflies. Then I stamped the sentiment to the left side of the panel in onyx black Versafine ink. This completed the front panel, and I popped it up with foam adhesive over top of a block of gold vellum to the card front.
Next I diecut the stitched butterflies from Shimelle heart patterned paper, gold vellum & gold glitter paper. I adhered them together, then gave the wings some dimension. Once they looked how I wanted, I glued them to the card front.
Then I added three of the small butterflies that were diecut from the inked panel. I tried to add them in an area with a different shade of pink so that they wouldn't get lost on the panel. And, of course, I popped the wings up with a litle dimension! :)
Finally, I accented the card front & teeny butterflies with my signature jewels here & there!
This card used a bit more product than I normally do, but most are items that can be used many times before needing to repurchase/replenish. All items used are linked below for your shopping convenience. Sadly, I've had the gold vellum in my stash for awhile, and couldn't find it anywhere to link it up. So sorry about that - you could blend gold ink to standard vellum to make your own. It might be a little messy, but probably very pretty! Hmmmm....I think I might try it! :)
I hope that you liked my sweet little fluttery card with a missing you theme! That is all I have to share with you today, but I will be back soon with more cardmaking inspiration!
Before you get on with your day, I wanted to invite you to follow me on social media! I hang out on Instagram a lot, and share my work in progress in my stories...along with REALLY cute photos of my dogs! :) Plus, I just started a YouTube channel, and while there are only 3 videos right now...I will be adding new content consistently!
SUPPLY LIST
For your shopping convenience, all products are linked below. {Includes affiliate linking where possible - this allows small compensation for me at no cost to you. Never fear - I will only ever link to products that I truly love & use!}


6 comments
What a lovely card!! I really like how you created the background with the oxide inks. Your use of the dies is just fabulous!
ReplyDeleteWow This is gorgeous!! 😍
ReplyDeleteBeautiful card Lea. Love the soft background and the amazing cover plate!
ReplyDeleteI love this pretty card!
ReplyDeleteSo very very pretty. I just love your colours. I have to admit, gold and pink are my favourite too. And my favourite embellishments are butterflies. So this card has everything I love. So so pretty!
ReplyDeleteLea, I'm am loving alot!!!! This card is the perfect amount of glimmer and shine and is stunning!!!
ReplyDeleteComments warm my heart. Thank you! ♥